Navigation
Install the app
How to install the app on iOS
Follow along with the video below to see how to install our site as a web app on your home screen.

Note: this_feature_currently_requires_accessing_site_using_safari
More options
You are using an out of date browser. It may not display this or other websites correctly.
You should upgrade or use an alternative browser.
You should upgrade or use an alternative browser.
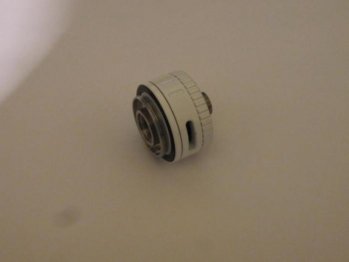
Kangertech Subtank mini -How to dismantle it?
- Thread starter DaveH
- Start date
Holding the base still, the top part with the o ring unscrews, FF to 1min
Thanks blujeens, I have seen that video, it was the only one I found. I have watched it a few times seems it should screw off. A couple of us have tried with no success - may be it is just bluudy tight.
Thanks
Dave
Thanks
Dave
A number of us have tried to unscrew it with no success.
On further investigation there were numerous complaints of it unscrewing unintentionally and the small detent ball was lost. To stop this happening it has been suggested that loctite is now used.This makes it very difficult to unscrew and some guys have 'destroyed' their tank trying.
Mine maybe one of those tanks with the loctite.
Dave
I'd try a boiling water bath, ie 100deg C, usually heat will loosen loctite'd threads, if the boiling water doesnt do the trick, I'd be very tempted to pull out the heatgun. (on low temp 1st)Mine maybe one of those tanks with the loctite.
Dave
Probably best to first remove all orings that can be removed before the heatgun comes out.
Hi blujeenz, the blue loctite will loosen with normal hand tools and if required a little heat will help. If I could use a spanner it would come loose, the major problem with this tank is holding it and loosening the ring without damaging it. I will need to find something to hold it without damaging it and then something to unscrew it. I'll have to look to see if I have something suitable to hold it. Round things are always a bother to hold.
Dave
Dave
I think once it is 'cracked' it will come off. I doubt if they would have used the red loctite and they probably have just put one blob on the threads I can't see the whole thread being coated.
Dave
Dave
I will need to find something to hold it without damaging it and then something to unscrew it. Round things are always a bother to hold.
Dave
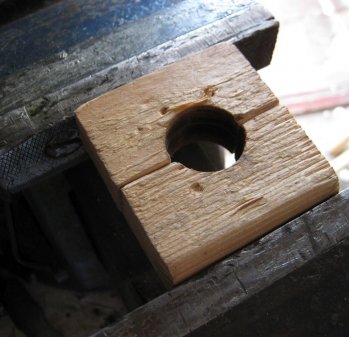
True words that, I have drilled a 25mm hole in wood with a hole saw and then cut the wood in half, lined the inside with inner tube rubber and squeezed it in a vice to clamp my Kayfun without any scratches. Its a fair amount of fiddle but worth it for peace of mind.

Yep, that's the way blujeenz 
Dave
Dave
Thank you guys for all your helpful suggestions, I've decided to leave it as it is.
I don't want to damage it needlessly. I was going to paint it to match the Kbox mini but that is not required now because the Kbox mini has a brushed finish.
Thanks for all your help guys.
Dave
I don't want to damage it needlessly. I was going to paint it to match the Kbox mini but that is not required now because the Kbox mini has a brushed finish.
Thanks for all your help guys.
Dave
Similar threads
- Replies
- 3
- Views
- 438
- Replies
- 7
- Views
- 539
- Replies
- 0
- Views
- 266
- Replies
- 0
- Views
- 443


