Refurbish Kbox mini

DaveH

Vaping Enthusiast
LV
22
 
Joined
8/10/15
Posts
893
Awards
22
Age
76
Location
Kempton Park
I'm thinking of changing the colour of my Kbox mini, first I need to remove the 'paint'.
Looking at the Kbox I'm reasonably sure it is powder coated and using an abrasive method is not my idea of fun, plus I'm far too lazy. :--)
So I need a chemical process does anyone know of a product that is locally available and comes in a spray can or small tin that will remove powder coating.
Or am I stuck to use Methylene chloride.:-(

Dave
maybe this will be of help

http://www.ecigssa.co.za/decided-to-polish-subox-box-mini.t15837/
 
:rofl:
Yep, I have read that post - it stirred me on to do mine but too much hard work using wet/dry paper so I really want to use a chemical method to remove the paint.
I'm all for easy - goes with my lazy nature :D
What I did think if I was a powder painter I would certainly have an easy way to get the paint off if I messed up. So on Monday I'll phone a couple of powder painters and see what they use to get the powder coating off. There must be an easy way.
Also I have to agree with Khan83 it is quite simple to take apart, undo the two screws and it virtually falls apart.
Dave
 
Last edited:
Got some stuff to clean the powder coating off and after a few hours ............ done.
I thought some of you may like to see a few pics.
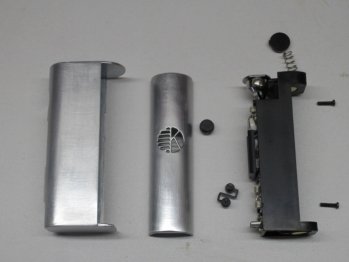
All the powder coating removed showing the innards
IMG_1940.jpg

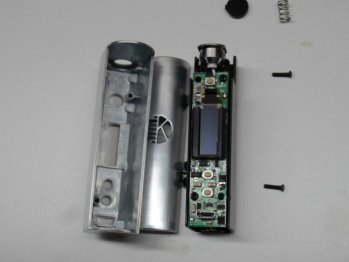
On the left (that's the side of the road most of us drive on :D) the 'studs' for the screws (2) can be seen. Also at the top there is a slot for the 510 connectors flange to slot in. Nice bit of casting.:)
IMG_1941.jpg

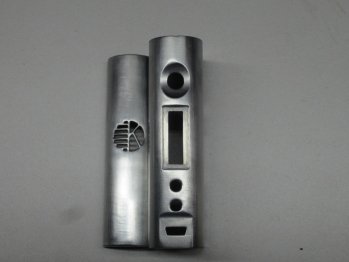
Just showing the front and back
IMG_1946.jpg

:)
Dave
 
Got some stuff to clean the powder coating off and after a few hours ............ done.
I thought some of you may like to see a few pics.
All the powder coating removed showing the innards
View attachment 40107

On the left (that's the side of the road most of us drive on :D) the 'studs' for the screws (2) can be seen. Also at the top there is a slot for the 510 connectors flange to slot in. Nice bit of casting.:)
View attachment 40108

Just showing the front and back
View attachment 40109

:)
Dave
now this is one awesome post thank you so much i need to strip down @Fogie subox somehow juice has leaked into the lcd section and need to clean his mod up
 
are you going to clear coat it or make it black ?
 
are you going to clear coat it or make it black ?
Neither and it is a secret (not really a secret) I'm keeping it as a surprise. Just in case it is a failure :rolleyes:

Remove the two screws and just pull the innards out - wiggle it a little, you will see it start to ease out. Just mind the top battery connection - the black plastic disc and the spring doesn't fly off into the sunset, put your finger on it as it comes out.
You can leave the clear window for the OLED where it is, I don't think you will need to remove it in your case.
:)
Dave
 
Got some stuff to clean the powder coating off and after a few hours ............ done.
I thought some of you may like to see a few pics.
All the powder coating removed showing the innards
View attachment 40107

On the left (that's the side of the road most of us drive on :D) the 'studs' for the screws (2) can be seen. Also at the top there is a slot for the 510 connectors flange to slot in. Nice bit of casting.:)
View attachment 40108

Just showing the front and back
View attachment 40109

:)
Dave
@DaveH that's great, without sanding is a big plus. What may I ask did you use to remove the coating?
 
This is the 'stuff' and web site http://www.elara.co.za/main.html
elara chemical supplies
ULTRA STRIP - multi stripper.
It does contain Methylene Chloride. A must to work on Powder Coatings.
I bought the 750ml glass bottle, from the local Mica Hardware.
I can't take the credit for it ......... a guy by the name of Johan from Ferro South Africa at their Powder Coating plant Brakpan told me what to get ......... a good guy and a gentleman whom I have never met until today when I phoned the company looking for some help.

Horrible, dangerous and toxic stuff Methylene Chloride - burns the skin, will blind you and the fumes are toxic. It also burns and melts through those latex gloves - I went through 4 pairs.

So what ever you do don't vape near the bluudy stuff - :D :D :D Will definitely give a good hit :D :D :D

I also used a small fine wire brush (stainless steel 40mm long) to help things along.
:)
Dave
 
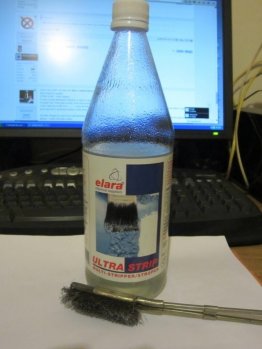
The web site is not the best I have seen, the bottle looks like this with the small wire brush in the foreground.
IMG_1948.jpg

Dave
 
Where were you when I was sanding my bloody fingers off:D . This would have saved me so much grief.

Great stuff . So whens the unveiling?;) , cant wait to see the finished product
 
It was your post Khan83 that got me started - so thank you.
Your very first post put me off sanding - far too much hard work for me. Sore arms and fingers ........ I thought to heck with that.
So I went the lazy way not so gratifying as the way you did it though, yours was a labour of love. It is not just the out come but how one gets there as well.

This is going to give it away, I'm going tomorrow to see what I can get done to it, so I will not be doing it - someone else will.
Not quite the same as you did, you did all yours from start to finish a far greater achievement than what I'm doing.
I'm just cheating.

Dave
Thanks mate. Trust me , any way you choose to do it the results will be gratifying . Plus you went the chemical route so hats off , you're a much braver man than me:).

The anticipation is killing me dude , itching to see what you have in store......so hurry up already:D
 
@DaveH awesome work man! I'm really into the DIY so I'm digg'n this post!!;)

Do you have any pics of what your Subox looked like before the strip?
 
I am pretty sure you can leave it in Coca-cola for a day or two ;)
 
@DaveH awesome work man! I'm really into the DIY so I'm digg'n this post!!;)

Do you have any pics of what your Subox looked like before the strip?
Thanks
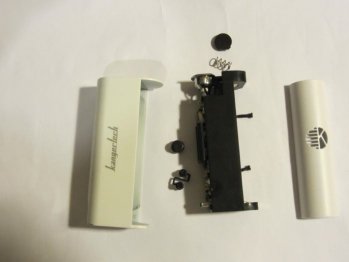
This is straight after it was taken apart, I don't have a pic before it was dismantled but it looked like any white subbox mini.
IMG_1934.jpg

Dave
 
The sad news is it won't be ready until Friday.
I hope I can last the wait. I have a plan I'll go late Thursday afternoon on the pretext 'I was just passing by' - it's just a little fib :)

Dave
 
Back
Top