What's up fellow vapers! It is Sunday which means I've got another review for you.
I have been delaying this review ever since I bought the tank in August last year because I wanted to make sure i did this right and the when I got to the wicking part, that I actually knew what I was doing. This tank is no stranger to us... Its the Wotofo Profile Unity..
The product I’m reviewing today needs no introduction. This RTA was brought out last year in 2019 and it hit us by storm. We didn’t expect it to turn out as well as it did. Of course, I’m talking about the Wotofo Profile Unity! This is the tank that turned me into the Mesh lover I am today. And I’m about to explain to you why.
The Profile Unity was made and designed in collaboration with Wotofo, #MrJustRight1 and The Vapor Chronicles. ORFR also joined in though by adding their incredible nexMESH coils with the package.
Here we have the box.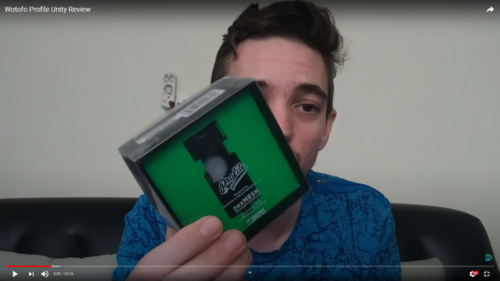
The contents of this box includes: 1 Profile Unity RTA,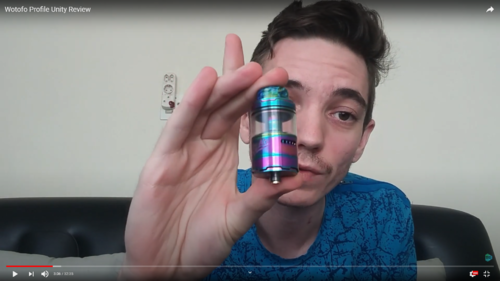
1 User Manual, 1 bag of Japanese Cotton that has the aglet on and is the correct thickness for mesh, 1 bag of nexMESH A1 Kanthal mesh strips, 1 bag of extra screws and O-rings, 1 Mesh tool which you use to bend the mesh strip, 1 screwdriver and 1 extension glass which makes it a 5ml capacity instead of 3.5ml. Lets get up close and personal with this tank.
Here we have the Profile Unity RTA. Ive got the rainbow colour but you do also get them in: Blue, Gold, Gunmetal, Stainless Steel and black.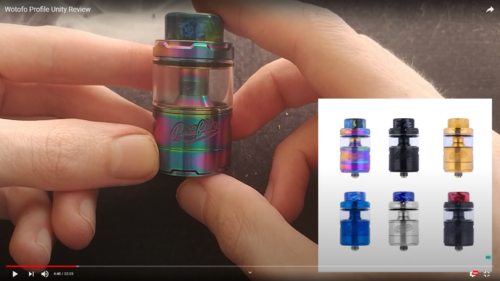
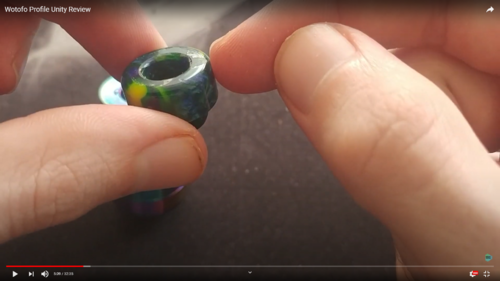
Let’s start from the top of the tank and work our way down. So the drip tip is a 810 resin drip tip but as you can see it’s a lot fatter than most drip tips out there and provides a soft comfortable feel on your lips and also makes it a lot harder for the drip tip to get very hot.
The next thing is the top cap. I love this part. Its super simple to open to refill your tank and super easy to close again. To open it, all you do is turn the top cap anti-clockwise until it stops and then pull the cap up, off the tank.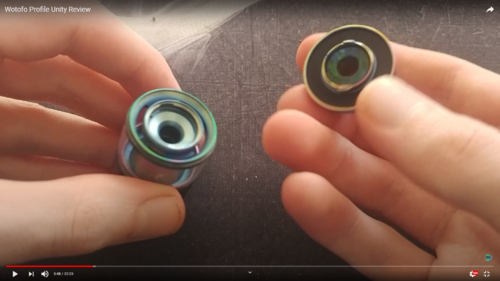
As you can see the juice holes are quite long and thin,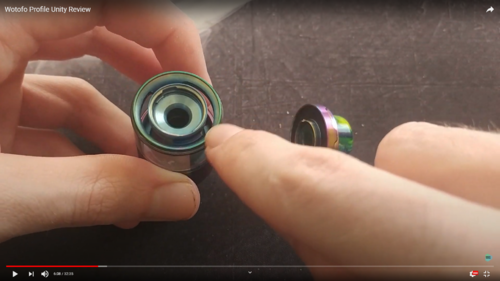
but they’ve also added a slant round the outside to help the juice flow down into the tank.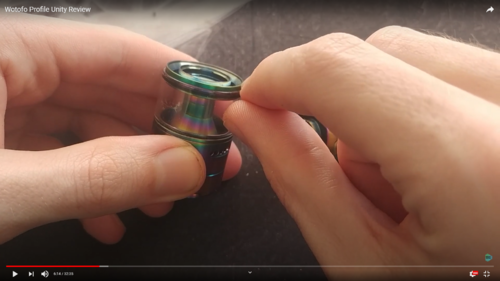
Don’t try to fill this up too quickly otherwise, you might end up having the juice overflow into the coil chamber which will then leak out and make you coil spit a lot of hot juice which with mesh is highly unpleasant. To screw the top cap back on, all you do is put the cap on, and turn it clockwise until it is sealed. Simple. No need for worrying about crossing threads and all that.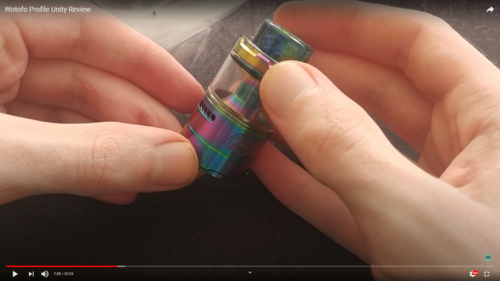
Next is the airflow control. Before we get to that I must mention, doesn’t this tank look a lot like the Geek Vape Blitzen?? Everything about this tank reminds of the Blitzen.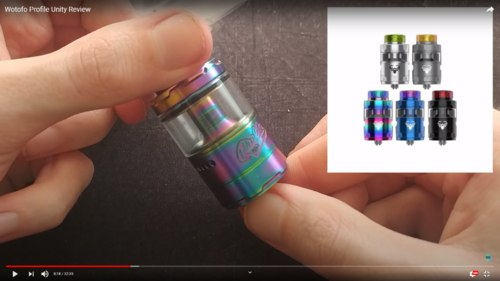
The airflow is one of those things. So, this is not top airflow but its not bottom airflow either. This is what we call side airflow. The air comes in directly onto the coil from the side and then goes up through the chimney. The same way the Blitzen is done. I do find that the amount of air is perfect. They give a nice range from a lot of air, to very restricted air.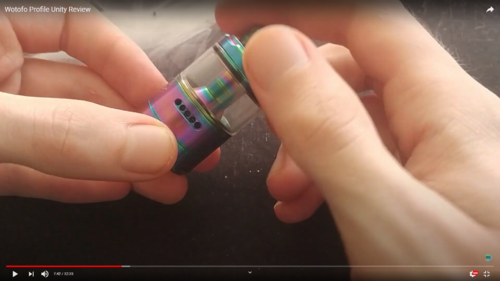
Now to the build deck. Opening this tank can be a pain if you tighten it too much or if cotton got stuck in the threads. You unscrew it by turning the tank upside down, and then turning the base anti-clockwise until you feel that there's no restriction from the threads and then you just pull the build deck out of the chamber.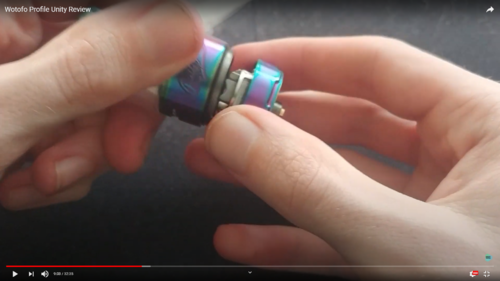
Here we have the build deck. Now here’s a cool fact about this build deck. Wotofo took the profile rda build deck and just optimized it for a tank. So it has the same design as a RDA which I think is really smart because RDA’s generally are very easy to build and wick on, and they deliver phenomenal flavor and cloud production.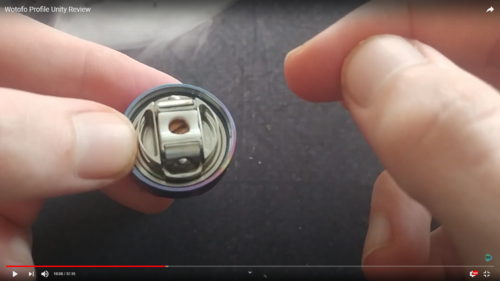
Lets set up this bad boy and see how it performs. To set this up is very easy. One thing I wish though is that they made these side plates spring loaded because they do sometimes get in the way when you are trying to install the coil.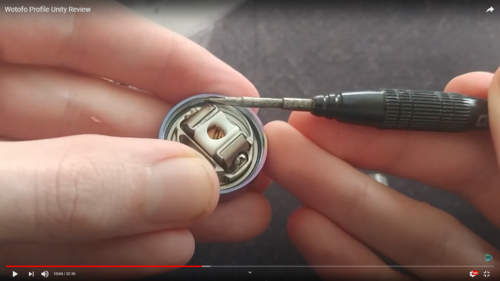
So first thing we do is take the mesh strip and use the mesh tool that we got in the box to bend the strip for the build deck.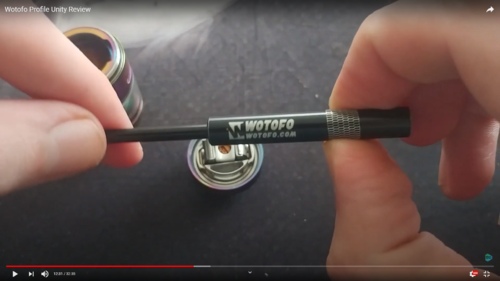
Then we put each side of the strip into the slots of here. We tighten them and there we go.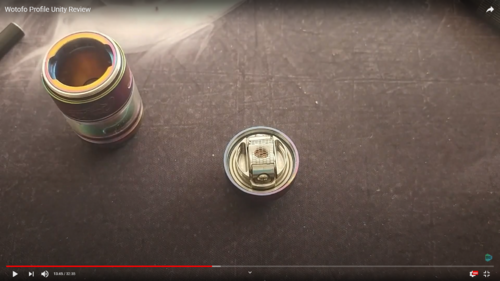
Coil is installed. Again, because this is mesh, there is no need to pre-fire the coil because there won’t be any hotspots. Now the wicking is where it gets interesting. There are a couple ways to wick the Profile Unity RTA. I’ve tried a couple different methods but the one that I’ve found to be the best performing method is the damming method. I got this method from Vaping with Vic, but I adjusted a few things. So, what we do is we get a nice thick piece of cotton, enough for mesh,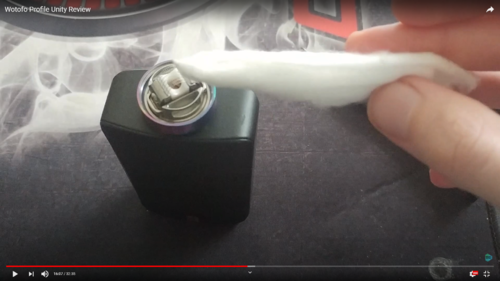
you slide it in, just like with all Rebuildable Atomizers, it needs to be a snug fit. Not too tight, but not too loose.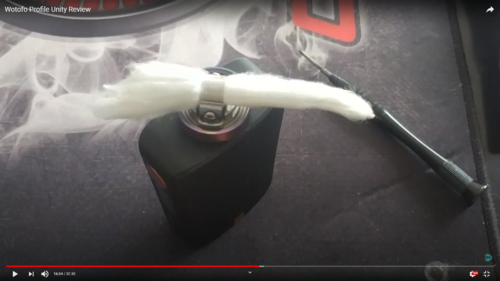
Once your piece of cotton is in, you take your scissors and you cut in between the outer base and the inner cage.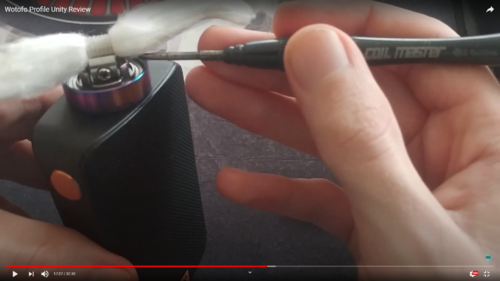
Do this on both sides.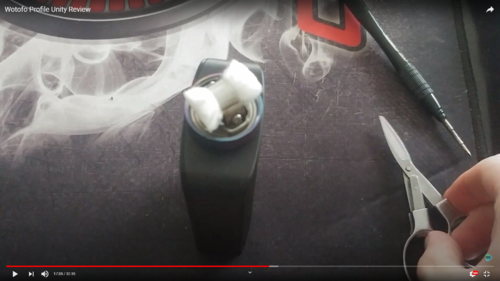
The you take a pin or something thin and you thin out the outer halves of your cotton. You don’t want to thin it out too much though, otherwise your tank will leak.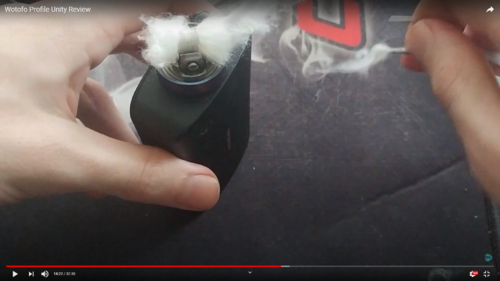
Once you’ve thinned out the cotton and trimmed the edges,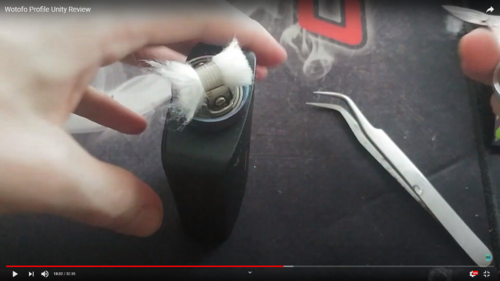
you take the juice that you are going to prime your coil with, and you wet your cotton. The reason we are doing this before we put the cotton into the juice holes is because when cotton gets wet, it expands,
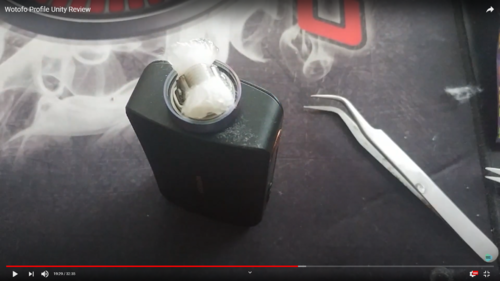
once you’ve wet the cotton, you take your ceramic tweezers, and you start pushing the cotton into the juice holes but you start from the bottom of the cotton and you work your way up. This ensures that the whole edge of your piece of cotton is facing down into point where your juice comes in.
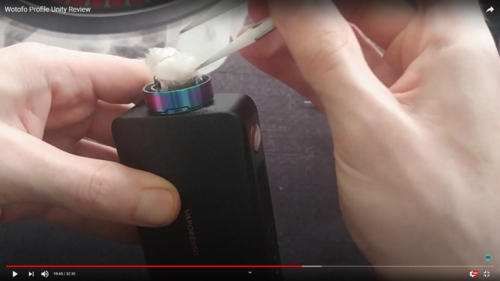
Once all the cotton is in,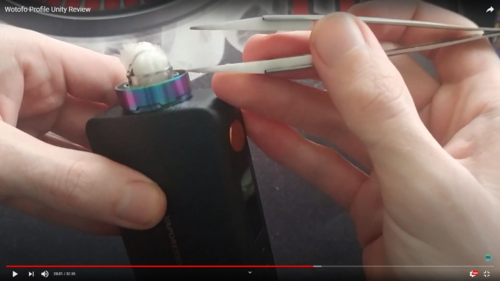
you then push the cotton up so that when you hold your build deck up at eye level, you can just see the base of the cotton peaking out from these slots. What this does, is it creates a dam. Hence the damming method.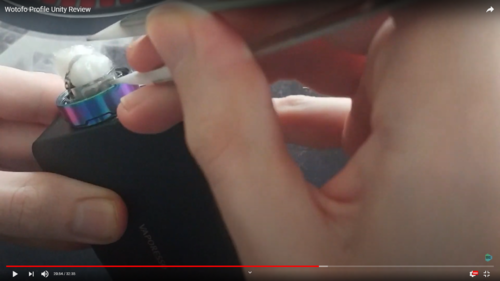
Repeat on the other side. Once that is done, put the tank back onto the build deck and there we go. You are ready to vape. Let’s get back to my beautiful face and see how she performs.
Okay so I've got a stainless-steel mesh strip in here so I’m running it on Temperature Control mode at 420 Degrees Fahrenheit. So straight off the bat, I’m getting incredible flavor production here, and cloud production isn’t that bad. I am not good at making large clouds with mesh guys. Okay now that that is out of the way lets have a look at my pros and cons for the Profile Unity.
Pros:
1. Drip Tip is very comfortable and stays cool
2. Top cap design is very user friendly
3. Flavor and cloud production are phenomenal
4. Great range of airflow
Cons:
1. The way you unscrew and screw the build deck back onto the tank can be difficult at times and you must always remove the tank from your mod if you want to rewick.
2. The wicking is very finicky so its very easy to get it wrong and can become very annoying when trying to figure out what wicking method works the best for you.
That’s its guys. If you are looking for an awesome mesh tank that delivers great flavor and you have experience with RTA’s then I’d advise getting the Profile Unity. If you don’t have a lot of experience with rebuilding, then rather get the Kylin M as it is easier and a lot more forgiving when wicking the tank.
I have been delaying this review ever since I bought the tank in August last year because I wanted to make sure i did this right and the when I got to the wicking part, that I actually knew what I was doing. This tank is no stranger to us... Its the Wotofo Profile Unity..
The product I’m reviewing today needs no introduction. This RTA was brought out last year in 2019 and it hit us by storm. We didn’t expect it to turn out as well as it did. Of course, I’m talking about the Wotofo Profile Unity! This is the tank that turned me into the Mesh lover I am today. And I’m about to explain to you why.
The Profile Unity was made and designed in collaboration with Wotofo, #MrJustRight1 and The Vapor Chronicles. ORFR also joined in though by adding their incredible nexMESH coils with the package.
Here we have the box.

The contents of this box includes: 1 Profile Unity RTA,

1 User Manual, 1 bag of Japanese Cotton that has the aglet on and is the correct thickness for mesh, 1 bag of nexMESH A1 Kanthal mesh strips, 1 bag of extra screws and O-rings, 1 Mesh tool which you use to bend the mesh strip, 1 screwdriver and 1 extension glass which makes it a 5ml capacity instead of 3.5ml. Lets get up close and personal with this tank.
Here we have the Profile Unity RTA. Ive got the rainbow colour but you do also get them in: Blue, Gold, Gunmetal, Stainless Steel and black.

Let’s start from the top of the tank and work our way down. So the drip tip is a 810 resin drip tip but as you can see it’s a lot fatter than most drip tips out there and provides a soft comfortable feel on your lips and also makes it a lot harder for the drip tip to get very hot.

The next thing is the top cap. I love this part. Its super simple to open to refill your tank and super easy to close again. To open it, all you do is turn the top cap anti-clockwise until it stops and then pull the cap up, off the tank.

As you can see the juice holes are quite long and thin,

but they’ve also added a slant round the outside to help the juice flow down into the tank.

Don’t try to fill this up too quickly otherwise, you might end up having the juice overflow into the coil chamber which will then leak out and make you coil spit a lot of hot juice which with mesh is highly unpleasant. To screw the top cap back on, all you do is put the cap on, and turn it clockwise until it is sealed. Simple. No need for worrying about crossing threads and all that.

Next is the airflow control. Before we get to that I must mention, doesn’t this tank look a lot like the Geek Vape Blitzen?? Everything about this tank reminds of the Blitzen.

The airflow is one of those things. So, this is not top airflow but its not bottom airflow either. This is what we call side airflow. The air comes in directly onto the coil from the side and then goes up through the chimney. The same way the Blitzen is done. I do find that the amount of air is perfect. They give a nice range from a lot of air, to very restricted air.

Now to the build deck. Opening this tank can be a pain if you tighten it too much or if cotton got stuck in the threads. You unscrew it by turning the tank upside down, and then turning the base anti-clockwise until you feel that there's no restriction from the threads and then you just pull the build deck out of the chamber.

Here we have the build deck. Now here’s a cool fact about this build deck. Wotofo took the profile rda build deck and just optimized it for a tank. So it has the same design as a RDA which I think is really smart because RDA’s generally are very easy to build and wick on, and they deliver phenomenal flavor and cloud production.

Lets set up this bad boy and see how it performs. To set this up is very easy. One thing I wish though is that they made these side plates spring loaded because they do sometimes get in the way when you are trying to install the coil.

So first thing we do is take the mesh strip and use the mesh tool that we got in the box to bend the strip for the build deck.

Then we put each side of the strip into the slots of here. We tighten them and there we go.

Coil is installed. Again, because this is mesh, there is no need to pre-fire the coil because there won’t be any hotspots. Now the wicking is where it gets interesting. There are a couple ways to wick the Profile Unity RTA. I’ve tried a couple different methods but the one that I’ve found to be the best performing method is the damming method. I got this method from Vaping with Vic, but I adjusted a few things. So, what we do is we get a nice thick piece of cotton, enough for mesh,

you slide it in, just like with all Rebuildable Atomizers, it needs to be a snug fit. Not too tight, but not too loose.

Once your piece of cotton is in, you take your scissors and you cut in between the outer base and the inner cage.

Do this on both sides.

The you take a pin or something thin and you thin out the outer halves of your cotton. You don’t want to thin it out too much though, otherwise your tank will leak.

Once you’ve thinned out the cotton and trimmed the edges,

you take the juice that you are going to prime your coil with, and you wet your cotton. The reason we are doing this before we put the cotton into the juice holes is because when cotton gets wet, it expands,

once you’ve wet the cotton, you take your ceramic tweezers, and you start pushing the cotton into the juice holes but you start from the bottom of the cotton and you work your way up. This ensures that the whole edge of your piece of cotton is facing down into point where your juice comes in.

Once all the cotton is in,

you then push the cotton up so that when you hold your build deck up at eye level, you can just see the base of the cotton peaking out from these slots. What this does, is it creates a dam. Hence the damming method.

Repeat on the other side. Once that is done, put the tank back onto the build deck and there we go. You are ready to vape. Let’s get back to my beautiful face and see how she performs.
Okay so I've got a stainless-steel mesh strip in here so I’m running it on Temperature Control mode at 420 Degrees Fahrenheit. So straight off the bat, I’m getting incredible flavor production here, and cloud production isn’t that bad. I am not good at making large clouds with mesh guys. Okay now that that is out of the way lets have a look at my pros and cons for the Profile Unity.
Pros:
1. Drip Tip is very comfortable and stays cool
2. Top cap design is very user friendly
3. Flavor and cloud production are phenomenal
4. Great range of airflow
Cons:
1. The way you unscrew and screw the build deck back onto the tank can be difficult at times and you must always remove the tank from your mod if you want to rewick.
2. The wicking is very finicky so its very easy to get it wrong and can become very annoying when trying to figure out what wicking method works the best for you.
That’s its guys. If you are looking for an awesome mesh tank that delivers great flavor and you have experience with RTA’s then I’d advise getting the Profile Unity. If you don’t have a lot of experience with rebuilding, then rather get the Kylin M as it is easier and a lot more forgiving when wicking the tank.


