Goblin mini - rewick

Marzuq

Goofy Guru
ECIGSSA Donor
VIP
LV
39
 
Joined
17/2/14
Posts
5,556
Awards
35
Location
Cape Town
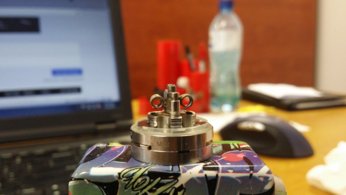
Ok guys so here is a quick and simple guide for wicking the goblin mini.

My build is 24g 2.5 ID 7 wraps dual coil
20150731_083314.jpg
20150731_083345.jpg
20150731_083356.jpg
As you can see the top of the coils is almost aligned with the top of the screw posts. Also try to align the coils as close to centre of the air holes.

Watch them glow!
20150731_083410.jpg
20150731_083430.jpg

Ok next you put ur cotton in. I've used some koh gen do/ Jap cotton.
Make sure there is some resistance when moving the cotton between the coil from side to side.
20150731_083708.jpg
Cut the cotton off by aligning the scissor with the edge of the base of the deck. This will make you cotton just long enough to reach the juice r channels. Blow into the cotton to fluff it out.
20150731_083843.jpg
And then trim off all the waste. Gently brush your cotton toward the juice channels. It should lay at the edge of the juice channel or jst about leaning into the juice channel.

Next screw the bottom part of the chimney in. Juice the wick generously and fire that socket up for about 2-3 seconds to allow the juice to be sucked into the cotton. Using a small screw driver gently stroke the cotton toward the juice channels one more time. Do not press down hard on the cotton as this will result in you block the juice channels and getting one hell of a dry hit!
20150731_083912.jpg

And next you screw on the last bits. Fill her up.. And just to make sure no leaks.. Open the airflow to max. Blow through the drip tip. Not to hard. Check the base for any juice. Wipe dry. Repeat this step one more time and then you ready to vape..

And the finished product.
20150731_084210.jpg
 
just an additional bit of information.

this build was run on my ipv4 at 40watts.
i chain vaped for about 15 minutes. half the tank gone and not a single dry hit. vape is nice and wet
 
just an additional bit of information.

this build was run on my ipv4 at 40watts.
i chain vaped for about 15 minutes. half the tank gone and not a single dry hit. vape is nice and wet
Around 0.3 ohms? Very tempted to take some time and clean and build mine now.
 
Around 0.3 ohms? Very tempted to take some time and clean and build mine now.
it reads at 0.24 ohms on the ipv4 screen.
Do the build you will happily surprised at the improvement
 
it reads at 0.24 ohms on the ipv4 screen.
Do the build you will happily surprised at the improvement
@Marzuq, I followed your instructions, but not quite to the letter. Please forgive me.

Coiled this little tank with 24 g Kanthal. Some 8 wraps per coil on a 2.5 mm mandrel. Came out to 0.3 ohms. Lowest I have ever gone mind you.

Li2HfDf.jpg


xGv4njd.jpg

Wicked with Rayon using the two cut method. Good explanation of this method in the video here.

Got out my favourite NET juice - Tarks Matador, in 18 mg! Filled the Goblin using a syringe. Exactly 3 ml - still leaves a space as you can see in the picture below.

OEK3VdE.jpg

The vape is good. Very, very effective at 40W with the air holes wide open - I can feel the Silver coming on. Shall have to reserve this tank for lower nic juices. The flavour is the best on any RTA I have ever used bar the GEM. For sure better than the Lemo2 for me. Best of all - no leaking at all so far - even took off the tank to check around the air holes after vaping for some time and some stand time. Not a dry hit in sight, which I struggled to get right with the Lemo2.

This for me is a beautiful little tank. And certainly lives up to the reputation it has garnered via the likes of @Marzuq, @Keyaam, @rvdwesth and others. A very much functional looker! Easy to build (4 post holes help a lot), easy and forgiving to wick and a great vape without leaks or dry hits. What more can one ask for! In the process the above entailed, I really could not find a single thing about the Goblin Mini that irritated me or was troublesome. Winner, winner, big steak dinner!

Off to get some headache tablets for the Silver.
 
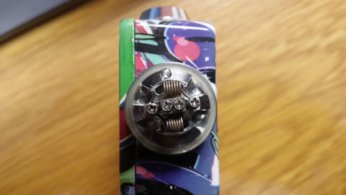
Ok guys so here is a quick and simple guide for wicking the goblin mini.

My build is 24g 2.5 ID 7 wraps dual coil
View attachment 32482
View attachment 32483
View attachment 32484
As you can see the top of the coils is almost aligned with the top of the screw posts. Also try to align the coils as close to centre of the air holes.

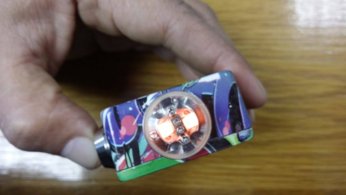
Watch them glow!
View attachment 32485
View attachment 32486

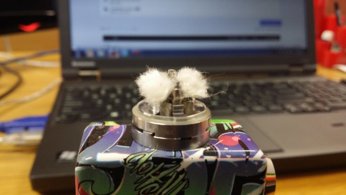
Ok next you put ur cotton in. I've used some koh gen do/ Jap cotton.
Make sure there is some resistance when moving the cotton between the coil from side to side.
View attachment 32488
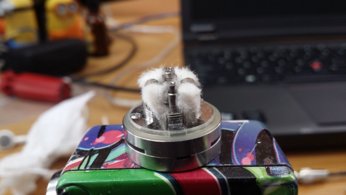
Cut the cotton off by aligning the scissor with the edge of the base of the deck. This will make you cotton just long enough to reach the juice r channels. Blow into the cotton to fluff it out.
View attachment 32489
And then trim off all the waste. Gently brush your cotton toward the juice channels. It should lay at the edge of the juice channel or jst about leaning into the juice channel.

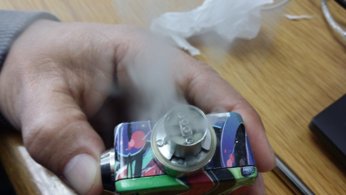
Next screw the bottom part of the chimney in. Juice the wick generously and fire that socket up for about 2-3 seconds to allow the juice to be sucked into the cotton. Using a small screw driver gently stroke the cotton toward the juice channels one more time. Do not press down hard on the cotton as this will result in you block the juice channels and getting one hell of a dry hit!
View attachment 32491

And next you screw on the last bits. Fill her up.. And just to make sure no leaks.. Open the airflow to max. Blow through the drip tip. Not to hard. Check the base for any juice. Wipe dry. Repeat this step one more time and then you ready to vape..

And the finished product.
View attachment 32492

GOOD TASTE in laptop make
 
@Marzuq, I followed your instructions, but not quite to the letter. Please forgive me.

Coiled this little tank with 24 g Kanthal. Some 8 wraps per coil on a 2.5 mm mandrel. Came out to 0.3 ohms. Lowest I have ever gone mind you.

Li2HfDf.jpg


xGv4njd.jpg

Wicked with Rayon using the two cut method. Good explanation of this method in the video here.

Got out my favourite NET juice - Tarks Matador, in 18 mg! Filled the Goblin using a syringe. Exactly 3 ml - still leaves a space as you can see in the picture below.

OEK3VdE.jpg

The vape is good. Very, very effective at 40W with the air holes wide open - I can feel the Silver coming on. Shall have to reserve this tank for lower nic juices. The flavour is the best on any RTA I have ever used bar the GEM. For sure better than the Lemo2 for me. Best of all - no leaking at all so far - even took off the tank to check around the air holes after vaping for some time and some stand time. Not a dry hit in sight, which I struggled to get right with the Lemo2.

This for me is a beautiful little tank. And certainly lives up to the reputation it has garnered via the likes of @Marzuq, @Keyaam, @rvdwesth and others. A very much functional looker! Easy to build (4 post holes help a lot), easy and forgiving to wick and a great vape without leaks or dry hits. What more can one ask for! In the process the above entailed, I really could not find a single thing about the Goblin Mini that irritated me or was troublesome. Winner, winner, big steak dinner!

Off to get some headache tablets for the Silver.

Great Job my mentor, will try this, my little tank is still in the box, time to unpack, only after I have painted the passage, fetched my Voodoo juice, and if my wife is not watching me take another box out of MY vaping drawer, getting tired of explaining why I must have these items, damn, I bought her an iStick and Nano, what more could she possibly want???
 
@Marzuq, I followed your instructions, but not quite to the letter. Please forgive me.

Coiled this little tank with 24 g Kanthal. Some 8 wraps per coil on a 2.5 mm mandrel. Came out to 0.3 ohms. Lowest I have ever gone mind you.

Li2HfDf.jpg


xGv4njd.jpg

Wicked with Rayon using the two cut method. Good explanation of this method in the video here.

Got out my favourite NET juice - Tarks Matador, in 18 mg! Filled the Goblin using a syringe. Exactly 3 ml - still leaves a space as you can see in the picture below.

OEK3VdE.jpg

The vape is good. Very, very effective at 40W with the air holes wide open - I can feel the Silver coming on. Shall have to reserve this tank for lower nic juices. The flavour is the best on any RTA I have ever used bar the GEM. For sure better than the Lemo2 for me. Best of all - no leaking at all so far - even took off the tank to check around the air holes after vaping for some time and some stand time. Not a dry hit in sight, which I struggled to get right with the Lemo2.

This for me is a beautiful little tank. And certainly lives up to the reputation it has garnered via the likes of @Marzuq, @Keyaam, @rvdwesth and others. A very much functional looker! Easy to build (4 post holes help a lot), easy and forgiving to wick and a great vape without leaks or dry hits. What more can one ask for! In the process the above entailed, I really could not find a single thing about the Goblin Mini that irritated me or was troublesome. Winner, winner, big steak dinner!

Off to get some headache tablets for the Silver.
If you are happy with it then they have surely done this tank justice. Really glad you are happy with the build. I vape 3mg juices so I am very distant from a silver but with flavour like this.. Who knows. I might just have my first
 
Great Job my mentor, will try this, my little tank is still in the box, time to unpack, only after I have painted the passage, fetched my Voodoo juice, and if my wife is not watching me take another box out of MY vaping drawer, getting tired of explaining why I must have these items, damn, I bought her an iStick and Nano, what more could she possibly want???
Lol, join the wife evading club! She has isticks with mANs and a Subox Mini Kit!
 
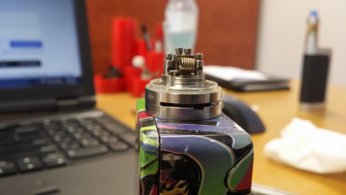
Ok guys so here is a quick and simple guide for wicking the goblin mini.

My build is 24g 2.5 ID 7 wraps dual coil
View attachment 32482
View attachment 32483
View attachment 32484
As you can see the top of the coils is almost aligned with the top of the screw posts. Also try to align the coils as close to centre of the air holes.

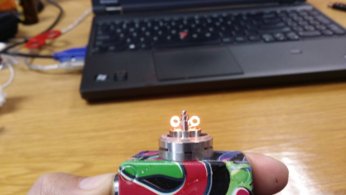
Watch them glow!
View attachment 32485
View attachment 32486

Ok next you put ur cotton in. I've used some koh gen do/ Jap cotton.
Make sure there is some resistance when moving the cotton between the coil from side to side.
View attachment 32488
Cut the cotton off by aligning the scissor with the edge of the base of the deck. This will make you cotton just long enough to reach the juice r channels. Blow into the cotton to fluff it out.
View attachment 32489
And then trim off all the waste. Gently brush your cotton toward the juice channels. It should lay at the edge of the juice channel or jst about leaning into the juice channel.

Next screw the bottom part of the chimney in. Juice the wick generously and fire that socket up for about 2-3 seconds to allow the juice to be sucked into the cotton. Using a small screw driver gently stroke the cotton toward the juice channels one more time. Do not press down hard on the cotton as this will result in you block the juice channels and getting one hell of a dry hit!
View attachment 32491

And next you screw on the last bits. Fill her up.. And just to make sure no leaks.. Open the airflow to max. Blow through the drip tip. Not to hard. Check the base for any juice. Wipe dry. Repeat this step one more time and then you ready to vape..

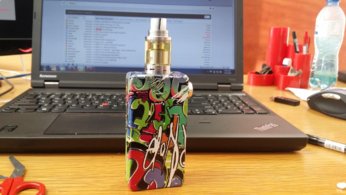
And the finished product.
View attachment 32492

Great Review bud and love the detailed info and pics!!

I also love you box mod it looks great!
 
you guys think it will be a good bet if I get myself this type of setup with superohm in mind. dont think im ready for sub
 
you guys think it will be a good bet if I get myself this type of setup with superohm in mind. dont think im ready for sub

This tank will perform regardless of whether you are a subohmer or not.
If you a single. Coil guy then use the little blocker that is given to block off the juice channels on the side which you will not be using.

They really thought of everything with this tank
 
Thanks @Marzuq for all the info on the goblin mini and thanks @Andre for your write up.

I am so far behind that I just look at these posts and think "oh boy, here we go again ...."

There's too much great gear I need to get.... Not to mention the great juices coming out.

I need to take a deep breath and get stuck in
 
I have once again Rewicked. Seeing I'm running low ohms and high watts I have decided to give old Faithfull rayon a try. I have to say compared to the Jap cotton I am now getting some distinct differences in the flavour. I am vaping clouds of icarus lemon bar on both builds..
I will let the rayon settle in and report back any findings different to my initial impressions
I rebuilt and rewicked last night. 24g 2.5id 7wrap dual 0.26 ohms on the evic at 45watts and its chucking some heavy clouds. No dry hits or leaks.


Sent from my iPhone using Tapatalk
 
@Marzuq,I'll be trying this on my mini next build.Nice.
 
Ok guys so here is a quick and simple guide for wicking the goblin mini.

My build is 24g 2.5 ID 7 wraps dual coil
View attachment 32482
View attachment 32483
View attachment 32484
As you can see the top of the coils is almost aligned with the top of the screw posts. Also try to align the coils as close to centre of the air holes.

Watch them glow!
View attachment 32485
View attachment 32486

Ok next you put ur cotton in. I've used some koh gen do/ Jap cotton.
Make sure there is some resistance when moving the cotton between the coil from side to side.
View attachment 32488
Cut the cotton off by aligning the scissor with the edge of the base of the deck. This will make you cotton just long enough to reach the juice r channels. Blow into the cotton to fluff it out.
View attachment 32489
And then trim off all the waste. Gently brush your cotton toward the juice channels. It should lay at the edge of the juice channel or jst about leaning into the juice channel.

Next screw the bottom part of the chimney in. Juice the wick generously and fire that socket up for about 2-3 seconds to allow the juice to be sucked into the cotton. Using a small screw driver gently stroke the cotton toward the juice channels one more time. Do not press down hard on the cotton as this will result in you block the juice channels and getting one hell of a dry hit!
View attachment 32491

And next you screw on the last bits. Fill her up.. And just to make sure no leaks.. Open the airflow to max. Blow through the drip tip. Not to hard. Check the base for any juice. Wipe dry. Repeat this step one more time and then you ready to vape..

And the finished product.
View attachment 32492
Marzuq,just finished the build of yours.I'm breaking it in at8.6w on my ipv mini 70w can't believe the flavor and clouds! I don't even need to turn it up, but you know I will.Thanks.
 
Marzuq,just finished the build of yours.I'm breaking it in at8.6w on my ipv mini 70w can't believe the flavor and clouds! I don't even need to turn it up, but you know I will.Thanks.

Glad you enjoying it. Took me a while before I got to that build. But now I have my sweet spot
 
Thanks to @Marzuq for giving me 24g wire to try the 7 wrap 2.5mm ID at 0.3 ohms on this mini. All I can say is wow. What a difference in this tank. It vapes beautifully. Really enjoying the mini now. Tank just warms up quite quickly and juice flies lol. But overall, very glad I got this tank. I concur with all the great reviews :clap::rock:
 
Back
Top