Kayfun Lite Plus

That is a awesome coil for a first time - congrats. On the Kayfun it is should rotate 45 to 90 degrees from where you have it, makes wicking easier as well. The secret with cotton is not too much. The ID looks thick enough for me.

OMG that makes so much sense now you say it! It will be a lot easier to position and fit as well! Let me suck the Kayfun dry and will make another coil and wick a bit later... I'm actually getting better flavour now and it is comparing to the Nautilus pretty well and I'm sure when I get the coil positioned with a decent wick I can only imagine the improvement!

Thanks @Matthee!
 
OK I finally sat down and opened the new tool box...

A few issues worth noting...

  • The lighted magnifying glass thingy is going to be a MUST have... I nearly went blind trying to see things...
  • Also an Ohm Meter stand is also a MUST... I dropped nearly everything on the floor trying to keep stable.
  • Also the Windmill lighter is no good and the button heats up and that too has to be threw into the air and away from ones paw to avoid third degree burns. Stealing ones daughters creme brulee lighter is the way forward.
  • Also you need calm music in the background because you need to be steady handed and not bop and weave to Lily Allen singing "Hard Out There".
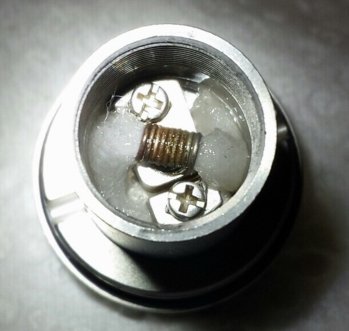
OK the little screw driver seemed to be the easiest to start with and I made a nice coil... but after heating it up and getting it all neat and tidy and having a go at putting it onto the screws the wire broke right by the coil so that was a bust... let's start again and go gently and slowly!
View attachment 2266

Not too bad hey Nigel?

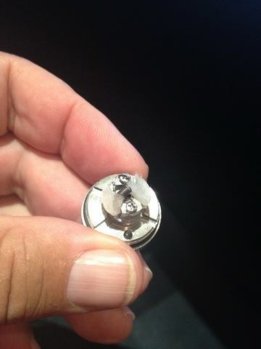
View attachment 2267

OK trying to put it onto the screws was a nightmare... I need that magnifying glass thingy real bad and battled for some time but eventually got it on.

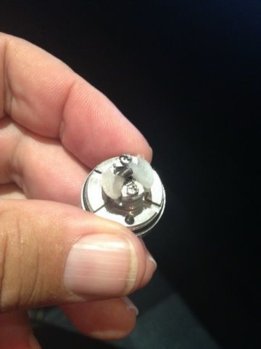
View attachment 2268

Amperage reading 1,2!

View attachment 2269

Let's fire this bad boy up! Nice glow, looking good!

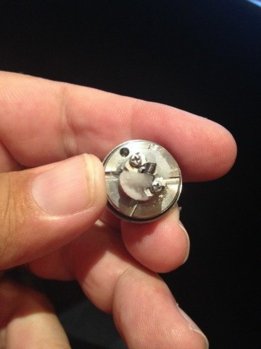
OK I need to practice making the wick because mine ended up thick on one side and fat on the other but by now I was eager to fill and fire it up!

The U-Can was a big win... highly recommended for the Kayfun filling hole! Screw it back onto the SVD and let's rock and roll!

View attachment 2270

It worked! I'm a master coil maker!

Actually that was a bit of a lie and I need to now go back and try make a better wick and maybe a wider coil for a thicker wick.

How did it taste I hear you all screaming? How was the vape? How was the flavour?

Actually Oooodles and Oooodels of vapour! Great in fact! Flavour wasn't as good as my Nautilus but I think that's because I have a really KAK wick!

But I have to say there is some immense satisfaction from making ones own coil and I will experiment a lot more.

I think the REO is a lot easier to operate and makes considerable sense now I see how easy it is to replace the little bottle and wick in the REO compared to the Kayfun.

I used VM Menthol Ice (Oh what a surprise) just so I could compare apples with apples!

Bottom Line: A lot of PT and hassle but love the fact I need about a million rands worth of tools and equipment and have all sorts of stuff to impress the hell out of people with my in-depth skills and knowledge of advanced vaping. I also appreciate all the ramblings in the threads I never used to really read and can now go back an appreciate the coil making stuff threads!

I have to say apart from the noise the Kayfun makes when drawing in.. the vape is pretty damn good and I look forward to the improvements as I learn the trick of this trade!

Buying the Kayfun Lite Plus and all the paraphernalia that goes with it was a big win!

A special thanks to @Matthee who pushed me to take this step.

lovely stuff @Rob Fisher

well done on your first setup!!!

i guarantee you the kayfun only gets better and better
 
OMG that makes so much sense now you say it! It will be a lot easier to position and fit as well! Let me suck the Kayfun dry and will make another coil and wick a bit later... I'm actually getting better flavour now and it is comparing to the Nautilus pretty well and I'm sure when I get the coil positioned with a decent wick I can only imagine the improvement!

Thanks @Matthee!
Yes, forgot to mention that - in that position the coil tails are in an easier position to fasten.
 
Aaaaahh awesome @Rob Fisher. Welcome to the dark side. Your coil looks awesome. IMHO nothing compares to vaping on your own coil and wick. Now the fun starts by tinkering to get your own perfect vape.
 
Agreed no clearomizer can beat nicely built rba

Sent from my SM-N9005 using Tapatalk
 
OK I opened her up and moved the coil a little and did a much better wick... I added the glass bit but now it gurgles and I'm getting juice in my gob... Yech! The juice is leaking out of the air hole... OMG juice everywhere... epic fail... stand by...
 
How did you fill? Is the o-ring around the chimney in place?
 
OK juice cleaned up... Kayfun cleaned... everything reseated... let me put the metal ring back and not the palstic see through piece... OK the metal ring that replaces the plastic ring is now missing... agggg let's try again with the see through ring... at least I'll know when the juice is running out instead of burning my wick in half and getting that burnt taste! :oops:
 
How did you fill? Is the o-ring around the chimney in place?

I filled it through the filling hole by removing the screw... the O-Ring is there but I think that's where it all went wrong... I think the metal ring may be slightly smaller and the chimney fits deeper in and seals around the O-Ring...
 
Gr r r r r r...get a r r r r R**! Just joking...be patient, you will get there.
 
I filled it through the filling hole by removing the screw... the O-Ring is there but I think that's where it all went wrong... I think the metal ring may be slightly smaller and the chimney fits deeper in and seals around the O-Ring...
Should not be smaller. Post a pic of your coil and wick to see if we can see something obviously wrong. I am no expert on the Kayfun, but others might help.
 
Maybe less cotton on the half decks, so that the edges are clear and the cotton is not blocking the juice channels.
 
I wick the kayfun differently, cant post a pic now. Checkout Rip Trippers Video clip on that! Works perfect.

Gesendet von meinem LIFETAB_E7316 mit Tapatalk
 
I agree with @Matthee , you actually need less cotton than you would think as the pressure system delivering the juice works really well. Also be sure to push the cotton down very loosely to ensure it doesn't block the channels, this has been working for me so far but I'm still refining the technique as I go.


Sent from the TARDIS
 
Just as an aside... I think the U-Can is more for drippers... I think the needle bottle is a better bet for filling the Kayfun Lite.
 
After my Kayfun 3.1 clone I bought from @VapeKing "attacked" me at the last vape meet and made me lie down on the couch with a MASSIVE NIC BUZZ, it has been sitting quietly for about a month and has not seen any action at all. I was too scared. It also leaked at the vape meet and had a strange taste. So I just left it.

But after seeing @Rob Fisher's adventures I decided there is no excuse, I need to get the Kayfun going. It's not a Lite Plus, just the normal 3.1. Don't ask me exactly what the differences are. They look fairly similar to me. I will post my Kayfun adventure here even though this is a Kayfun Lite thread. Hope no-one minds

Thank you all for your posts here. It has inspired me to get it going.

I have disassembled and all the parts have received their first Sunlight wash. I will give it a second wash now. One or two of the parts still have a slight machine oil smell to them.

Thanks for the RipTripper coil building video - was very good. I intend starting on the first standard horizontal coil he built.

My only concern at this stage is how to fill this thing correctly. RipTripper didn't show that. I know if you fill it incorrectly it will leak all over the place, like it did at the vape meet. (Which incidentally, I find strange since there were experienced folk putting it together and filling it for me).

I know @Tom and I think @Tornalca previously mentioned the top filling procedure with holding the air hole and turning it upside down etc. But does anyone know of a good Youtube video that shows it to you?

Will let you all know how it proceeds and hopefully how it vapes when I get it going...
 
Back
Top