My first coil!

Ravynheart

The Curious Raven
LV
8
 
Joined
11/6/15
Posts
198
Awards
8
Age
30
Location
Amanzimtoti
Hi everyone!
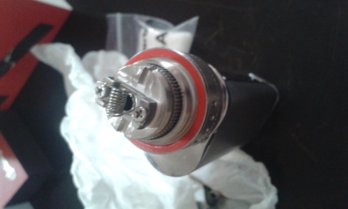
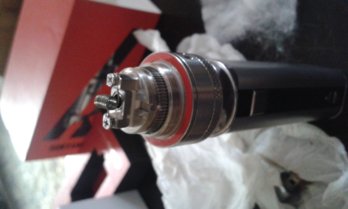
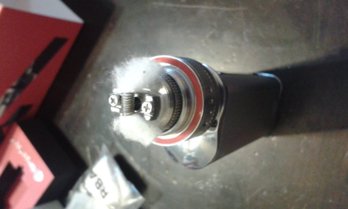
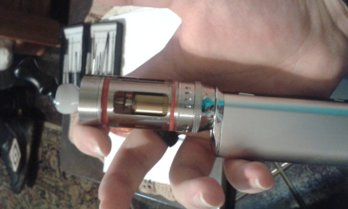
So after watching a number of tutorials on YouTube, I finally mustered up the courage to give RBA a go. I'm not exactly the smartest when it comes to this type of DIY, but hey, if all the guys can do it, surely I can too. I prefer my coils to be around 1 ohms and above, so, I used 26 gauge kanthal at then wraps at approx 2,5mm. I was sooo happy when this coil fired up. It reads on my istick 30w at 1.1 ohms, in my sweet spot! Here's the pics of my handiwork.
All opinions and reviews welcome!
 

Attachments

  • 20150630_154226.jpg
    20150630_154226.jpg
    192.4 KB · Views: 71
  • 20150630_154847.jpg
    20150630_154847.jpg
    202.6 KB · Views: 64
  • 20150630_162340.jpg
    20150630_162340.jpg
    211.5 KB · Views: 67
  • 20150630_165228.jpg
    20150630_165228.jpg
    206.2 KB · Views: 65
Hi everyone!
So after watching a number of tutorials on YouTube, I finally mustered up the courage to give RBA a go. I'm not exactly the smartest when it comes to this type of DIY, but hey, if all the guys can do it, surely I can too. I prefer my coils to be around 1 ohms and above, so, I used 26 gauge kanthal at then wraps at approx 2,5mm. I was sooo happy when this coil fired up. It reads on my istick 30w at 1.1 ohms, in my sweet spot! Here's the pics of my handiwork.
All opinions and reviews welcome!
Awesome, nice neat job there :rock:. My first attempt ended up in the bin ... and the 2nd ... and the 3rd:hit:! 4th is a happening thing tonight.
 
Remember to heat it up a few times before you put the wick in :) I like to heat it till it glows, and witha pair of pliers gently squeeze the coil together as I release the switch, this always helps with any hotspots, and prevents the coil from expanding once its in my atty. Then put your wick through (wait a bit for it to cool) and add some juice and t a test fire, then add more juice / prime it fully, and then close it up.
 
Hi everyone!
So after watching a number of tutorials on YouTube, I finally mustered up the courage to give RBA a go. I'm not exactly the smartest when it comes to this type of DIY, but hey, if all the guys can do it, surely I can too. I prefer my coils to be around 1 ohms and above, so, I used 26 gauge kanthal at then wraps at approx 2,5mm. I was sooo happy when this coil fired up. It reads on my istick 30w at 1.1 ohms, in my sweet spot! Here's the pics of my handiwork.
All opinions and reviews welcome!

@Ravynheart Well Done and Congrats...Waiting for my "missing" vape mail, when it eventually arrives, I will be using your pics as a guide...Will try and match your "handiwork"...
 
@DarkSide I'm honoured that my handiwork can be used as a guide :clap: I hope that it will prove to be useful! Looking forward to see your coil building! :D
 
Super first coil @Ravynheart !
Well done

What juice did you try on your first coil?
How did it taste?
 
Hi everyone!
So after watching a number of tutorials on YouTube, I finally mustered up the courage to give RBA a go. I'm not exactly the smartest when it comes to this type of DIY, but hey, if all the guys can do it, surely I can too. I prefer my coils to be around 1 ohms and above, so, I used 26 gauge kanthal at then wraps at approx 2,5mm. I was sooo happy when this coil fired up. It reads on my istick 30w at 1.1 ohms, in my sweet spot! Here's the pics of my handiwork.
All opinions and reviews welcome!
Great coil bud!

Nothing beats the satisfaction of vaping on your first coil!

Looking forward to seeing your future builds :D

Sent from my SM-N9005 using Tapatalk
 
@free3dom what can be done to correct it?

Open up the RBA base - unscrew only the small top part.

Now take something small, like a screwdriver, and push the cotton towards the coils.

Do this until you can see the light coming through juice channel.

Repeat the process on the other side, and then close it up and give it a go again :)
 
Back
Top