REO Reborn

kevkev

REOmized
LV
37
 
Joined
11/6/14
Posts
590
Awards
23
Location
JHB
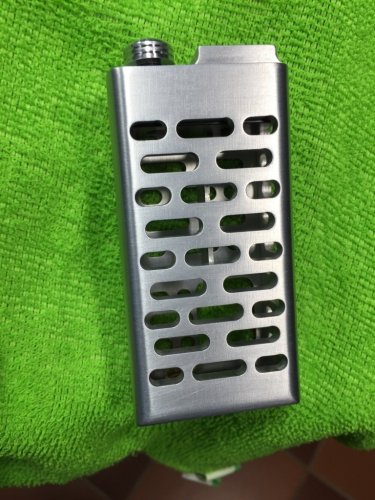
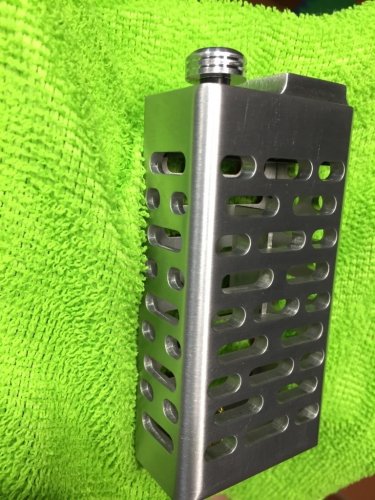
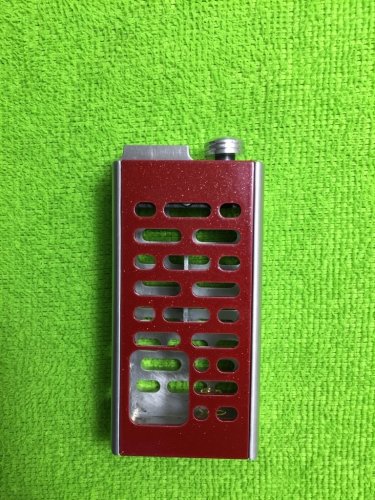
I purchased a REO from a fellow forumite earlier this week, and he told me that the paint job on it was really bad. Functionality wise it was working 100%, but I decided that I would like to fix it up and restore it to some extent.

He was not kidding when he said the paint job was bad. :eek:

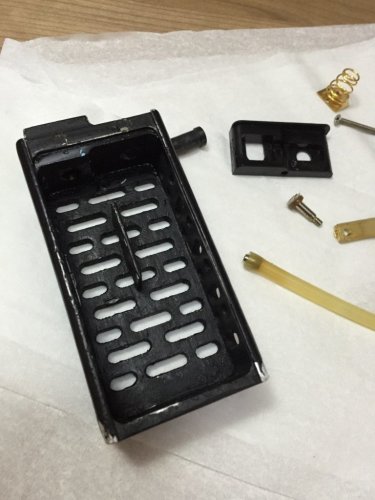
The hardest part of getting it to where it is now was the SL holes, they took forever to clean out. Some sort of primer was stuck in them that the Paint Stripper failed to remove.

I used a scouring pad to shine it up a bit, and give a brushed finish. Also cut the pad into small strips, fed them through the SL holes and did a back and forth jobby to get the stuck primer out.

Not quite done with this REO, I still have to rebuild the insulator for the 510 and do some more scouring on the inside and a little more on the outside.

The following pictures I attached shows the bad paint job, and then where I am with it now.

thumb_IMG_4040_1024.jpg thumb_IMG_4041_1024.jpg thumb_IMG_4042_1024.jpg thumb_IMG_4055_1024.jpg thumb_IMG_4056_1024.jpg thumb_IMG_4057_1024.jpg
 
I purchased a REO from a fellow forumite earlier this week, and he told me that the paint job on it was really bad. Functionality wise it was working 100%, but I decided that I would like to fix it up and restore it to some extent.

He was not kidding when he said the paint job was bad. :eek:

The hardest part of getting it to where it is now was the SL holes, they took forever to clean out. Some sort of primer was stuck in them that the Paint Stripper failed to remove.

I used a scouring pad to shine it up a bit, and give a brushed finish. Also cut the pad into small strips, fed them through the SL holes and did a back and forth jobby to get the stuck primer out.

Not quite done with this REO, I still have to rebuild the insulator for the 510 and do some more scouring on the inside and a little more on the outside.

The following pictures I attached shows the bad paint job, and then where I am with it now.
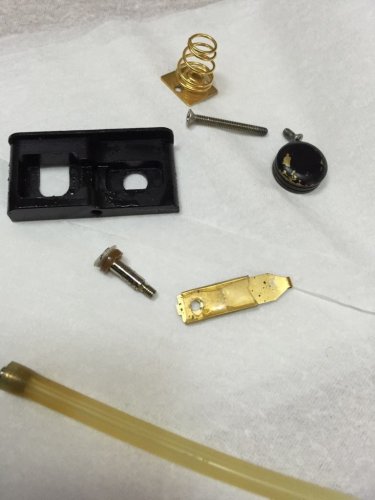

View attachment 50477 View attachment 50478 View attachment 50479 View attachment 50480 View attachment 50481 View attachment 50482

Love it. Nice job so far.
 
Nice one @kevkev .
I can only imagine the time you've spent to get her looking like that and I'm sure those fingers are a little soar. Trust me I know.
But we'll worth it bud.
 
I purchased a REO from a fellow forumite earlier this week, and he told me that the paint job on it was really bad. Functionality wise it was working 100%, but I decided that I would like to fix it up and restore it to some extent.

He was not kidding when he said the paint job was bad. :eek:

The hardest part of getting it to where it is now was the SL holes, they took forever to clean out. Some sort of primer was stuck in them that the Paint Stripper failed to remove.

I used a scouring pad to shine it up a bit, and give a brushed finish. Also cut the pad into small strips, fed them through the SL holes and did a back and forth jobby to get the stuck primer out.

Not quite done with this REO, I still have to rebuild the insulator for the 510 and do some more scouring on the inside and a little more on the outside.

The following pictures I attached shows the bad paint job, and then where I am with it now.
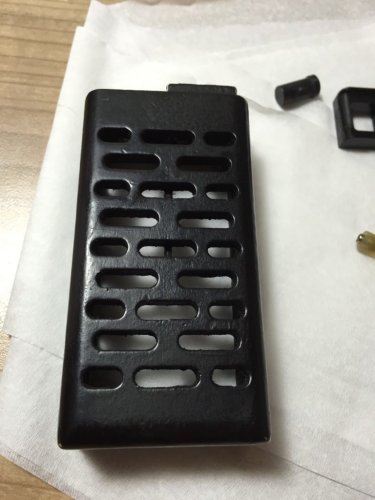

View attachment 50477 View attachment 50478 View attachment 50479 View attachment 50480 View attachment 50481 View attachment 50482

The difference already is like turning a dismal night into a bright new day. Great job. :applaudit:
 
The SA version of "Pimp my Reo" :thumbsup:Good job
 
Aww man I took 'before' pics of my Reo before, with scratches etc.

But my S6 bombed out, and before any photos were uploaded to any cloud.

I'm as happy as a pig in shit with the job I did. I can't believe its possible. I procrastenated a little more than I needed to, just because in the back of mind I was worried it wouldn't come out the way I wanted.

It is now years older than any other mod I own, and looks and more importantly, FEELS like the newest one I own.
 
Nice job dude.
You might want to try electrolysis to remove the primer, it would be easier than threading scourer strips through the holes.
Attach a neg lead from a 12V psu, ATX from a pc is fine, to the metal you want to clean and hook the pos up to a strip of SS electrode.
Submerge both in a soda bicarb solution and make sure the 2 connections dont short out, it will blow the psu.
After a while bubbles will form on the neg side and remove all impurities including paint, then its just a matter of time till its cleaned to your preference.
This process is usually done to steel to remove rust and leave the good metal untouched.
Dont use caustic soda as the solution because it erodes aluminium, start with a mild solution like 1 teaspoon to 500ml of water and add more to get more cleaning action.
A stronger solution means more current draw, monitor it with a current meter (DMM) if you have one, 2 to 3amps should be fine as an initial base point.
The higher the current the more aggressive the cleaning action = shorter time in the bath.
 
Aww man I took 'before' pics of my Reo before, with scratches etc.

But my S6 bombed out, and before any photos were uploaded to any cloud.

I'm as happy as a pig in shit with the job I did. I can't believe its possible. I procrastenated a little more than I needed to, just because in the back of mind I was worried it wouldn't come out the way I wanted.

It is now years older than any other mod I own, and looks and more importantly, FEELS like the newest one I own.

I also could not believe how easy and quick it went. And when I had washed all the gunk from the scouring pad off I could not believe how great it felt in my hand. Scary to start, but worth it in the end.
 
Nice job dude.
You might want to try electrolysis to remove the primer, it would be easier than threading scourer strips through the holes.
Attach a neg lead from a 12V psu, ATX from a pc is fine, to the metal you want to clean and hook the pos up to a strip of SS electrode.
Submerge both in a soda bicarb solution and make sure the 2 connections dont short out, it will blow the psu.
After a while bubbles will form on the neg side and remove all impurities including paint, then its just a matter of time till its cleaned to your preference.
This process is usually done to steel to remove rust and leave the good metal untouched.
Dont use caustic soda as the solution because it erodes aluminium, start with a mild solution like 1 teaspoon to 500ml of water and add more to get more cleaning action.
A stronger solution means more current draw, monitor it with a current meter (DMM) if you have one, 2 to 3amps should be fine as an initial base point.
The higher the current the more aggressive the cleaning action = shorter time in the bath.

Thanks man, I will keep that in mind for the next one, it took me a whole hour to do the holes, ;( I did not know there was an easier way, luckily there are only 3 or 4 which still needs some attention.
 
Super job, @kevkev :beer-toast1:

Looks like it had been painted by a previous owner... with a brush. The bonus is that this finish can be maintained forever.
 
Back
Top