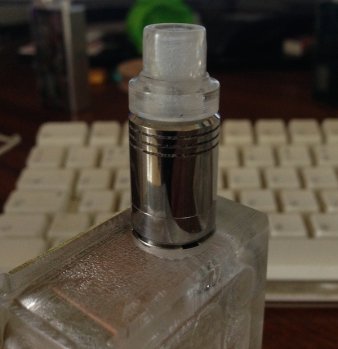
See Thru Mod (WIP)

Genosmate

Reo's For me
LV
46
 
Joined
24/4/14
Posts
1,865
Awards
34
Location
Knysna
I've got a couple of wood mods I've started but I'm waiting for a 'light bulb' moment with them before I continue.
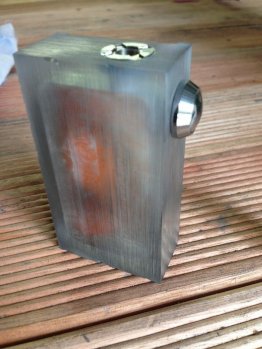
Got an offcut of 30mm thick clear something,not sure it's Acrylic,Polycarb,or poly something else so first I try and flame polish a bit and I think it will work (turns out this is not so).Right I'll make a see thru mod and I'll use a switch and wires (@johan stand by for many balls ups and questions) for a change.
I think I may end up polishing it with compounds but theres a way to go before that,oh @Rob Fisher the door is yours but I haven't touched it,I promise.
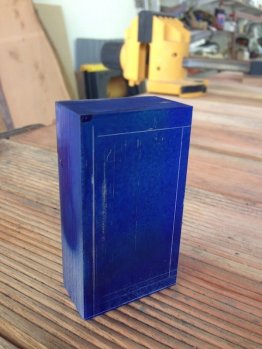
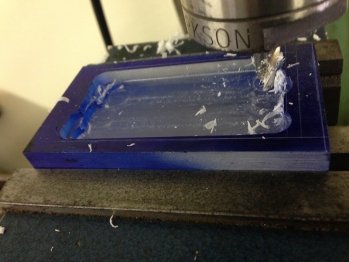
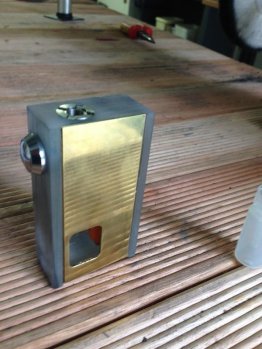
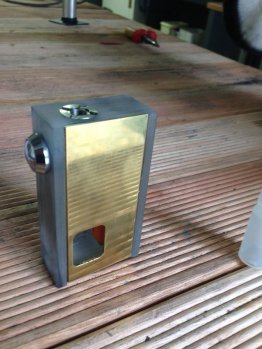
IMG_0756.jpg IMG_0757.JPG IMG_0758.jpg IMG_0759.jpg IMG_0760.jpg IMG_0761.jpg
 
Awesome @Genosmate, I standby and want to help you make it into a real X-mas box mod with RGB LED's when you press the firing button :p.
 
I like that superman-ice effect. Also, lucky bugger owns a milling machine (instant jealousy).
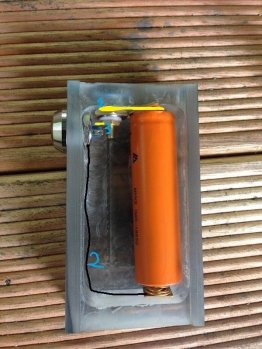
Spying your box, it looks like you could get away with one wire only.
Fit a plate under the top nut of the 510, this becomes your battery postive.
Epoxy the negative spring to the case, run one wire from there to one tab on the switch (bonus points if you mill a small recess for the wire, and some superglue to keep it in place)
Last trick would be to rotate that switch about 30deg clockwise, so that (hopefully), the other tab of the switch interferes with the positive pin/nut assembly and trap it under there.
is that what you were thinking of doing? or the mosfet route?
 
Awe struck


Sent from iPhone
 
Awesome @Genosmate, I standby and want to help you make it into a real X-mas box mod with RGB LED's when you press the firing button :p.
Thanks @johan .I'm not sure I can handle flashing lights as well,I printed the sketch and photo you sent me many months ago of the inside of @Rob Fisher Woodvill and I was going to ask how to solder,never mind flashing stuff!If you think it's possible I'll give it a go.
 
Wow, @Genosmate - most of us get excited on a long weekend if we manage to come up with a nice new coil that vapes well. You sommer make your own mod out of an offcut. Amazing stuff. Watching with much interest
 
I like that superman-ice effect. Also, lucky bugger owns a milling machine (instant jealousy).
Spying your box, it looks like you could get away with one wire only.
Fit a plate under the top nut of the 510, this becomes your battery postive.
Epoxy the negative spring to the case, run one wire from there to one tab on the switch (bonus points if you mill a small recess for the wire, and some superglue to keep it in place)
Last trick would be to rotate that switch about 30deg clockwise, so that (hopefully), the other tab of the switch interferes with the positive pin/nut assembly and trap it under there.
is that what you were thinking of doing? or the mosfet route?
Thanks.the idea was to have a clear polished block,but its not the rights stuff to flame polish,I've just played with some polishing compounds but maybe with a lot of fine sanding and the use of a Dremmel to polish the inside I may get what I was intending,if not then its the 'ice cube' look.
After reading your post many times (I'm very doff with wires) I get the clever idea of rotating the switch,I'll check if it possible and would of set it out that way if I'd been clever enough.
My plan was to make the positive connector for the battery from a brass screw which is threaded into the body and finished flush (visible on the outside) with the case,the spring I may still fix with a screw.
Honestly I don't know what a mosfet is.
 
Thanks @johan .I'm not sure I can handle flashing lights as well,I printed the sketch and photo you sent me many months ago of the inside of @Rob Fisher Woodvill and I was going to ask how to solder,never mind flashing stuff!If you think it's possible I'll give it a go.

Everything is possible, and even the impossible - it just takes a wee bit longer ;).
 
@johan,I forgot to ask earlier,in between the two solder points on the switch theres a little blue plastic knoppie can I file that off?
 
@johan,I forgot to ask earlier,in between the two solder points on the switch theres a little blue plastic knoppie can I file that off?

Yes you can, just an isolation protection for high voltage creeping to meet safety specs, and not applicable to low voltage like on mods.
 
i think you are making it difficult for yourself with regards the battery positive connection.
Being a mech, the battery can go in either way, and the power can flow through the coil in either direction.
So as you mod stands right now in the 3rd photo, where you have the square of brass at the positive connection...if that becomes a rectangle, drill a hole through one side of the rectangle and screw that to the negative of the 510 using the existing 510 collar "negative" locking screw. Thats it, job done.

You'll be switching the battery negative then to fire (which will be attached to the atty "positive" pin, and that makes no real difference unless you plan to run a clearomizer with built in led's

If it feels strange, there is no rule that says the positive needs to be at the top, so put the battery in upside down, but to me, there's a big advantage in simplicity due to the closeness of the battery + and the 510 in your 3rd photo...they're almost touching already.
 
IMG_0758.jpg
1 is a copper/metal strip...connecting battery positive to 510 negative.
2 is a wire...from memory most switches the body is part of the circuit..most likely negative but it doesnt matter...so the wire could possibly be screw behind the switch locking ring. Get a multimeter, set it to beep and see which legs beeps when you touch the casing of the switch)
3 is the (hopefully) contact point between one leg of the switch and the 510's "traditional" positive.(make sure this isnt the leg the battery negative wire is connected to...if it is, rotate the switch 180deg.)
Depending on the amp rating of the switch, you're ready to rock.
 
View attachment 26413
1 is a copper strip...connecting battery positive to 510 negative.
2 is a wire...from memory most switches the body is part...so the wire could possibly be screw behind the switch locking ring.
3 is the (hopefully) contact point between one leg of the switch and the 510's "traditional" positive.(make sure this isnt the leg the battery negative wire is connected to...if it is, rotate the switch 180deg.)
Depending on the amp rating of the switch, you're ready to rock.
Thanks Werner
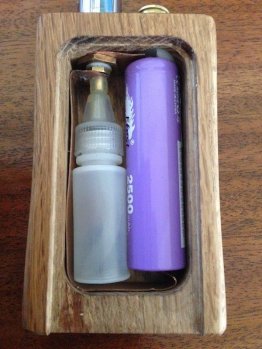
I was just reading your previous post and trying to work it out.Here's what I've done in a wood mod I made and this post of yours now makes perfect sense.
The piece of metal you can see at the + of the battery in pic 3 is actually just the ring supplied by FD's to solder to,its not fixed in.
Now @johan what about the flashing lights?
IMG_0731.jpg
 
Thanks Werner
I was just reading your previous post and trying to work it out.Here's what I've done in a wood mod I made and this post of yours now makes perfect sense.
The piece of metal you can see at the + of the battery in pic 3 is actually just the ring supplied by FD's to solder to,its not fixed in.
Now @johan what about the flashing lights?
View attachment 26414

I will draw up a simple graphic wiring schematic and post later/tomorrow, very, very easy - but "nou gaan ons braai, ja nou".
 
I've got a couple of wood mods I've started but I'm waiting for a 'light bulb' moment with them before I continue.
Got an offcut of 30mm thick clear something,not sure it's Acrylic,Polycarb,or poly something else so first I try and flame polish a bit and I think it will work (turns out this is not so).Right I'll make a see thru mod and I'll use a switch and wires (@johan stand by for many balls ups and questions) for a change.
I think I may end up polishing it with compounds but theres a way to go before that,oh @Rob Fisher the door is yours but I haven't touched it,I promise.
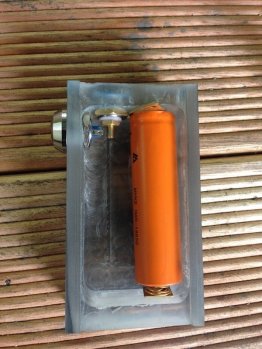
View attachment 26398 View attachment 26399 View attachment 26400 View attachment 26401 View attachment 26402 View attachment 26403
Hot damn another diy beauty
 
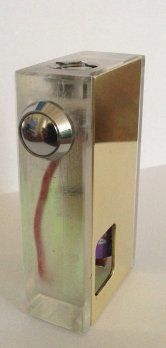
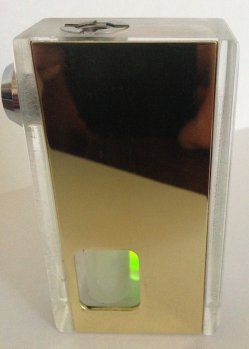
As I thought,because I couldn't flame polish the mod the inside is almost impossible to finish off,but with it cleaned and the outside polished it looks like an ice block suspended in clear acrylic.
I put a 3ml bottle in (a 6ml will fit) because I'm low on supplies and a green light especially for @Rob Fisher.
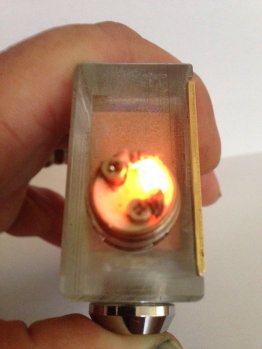
Iam properly kak at soldering but I managed it and it fires!
IMG_0770.jpg IMG_0771.jpg IMG_0773.jpg IMG_0774.jpg
 
You could try a Meguires product on the inside, if you have a dremel and some polishing bits. Its called PlastX and you should find it at your local Midas :)
 
Back
Top