I've tried various ones of these (all the youtube ones including re-using the coil and creating a new vertical coil) . The results were disappointing, mostly because it never really wicks the same as the stock coil again). My only issue with the Atlantis has been the fact that I cannot rebuild it.. But I found one that is works for me. So, here goes:
Start by disassembling the coil. Don't have pics for this but basically, you pull out the metal bit, the rubber bit, the little round sieve and the old coil and wicking. Be careful not to remove the lining on the side (for the moment).
Now about that lining. This might be the only tricky bit. Remove it carefully so as not to tear it. I used a small precision screwdriver and just teased it out. Now, cut two smaller pieces from it. There are two open holes and two covered by a metal bit. Insert the smaller pieces back behind these metal bits. I cut them to be the same width as the metal bits. After teasing them back in, you will see it from the outside. The open holes must remain open.
Now we build the coil. I did 4 wraps of 26g around a 2.4 screwdriver to give me something just north of 0.5ohms. This is not a tight coil. Tried that and got dry hits. Looks like this:
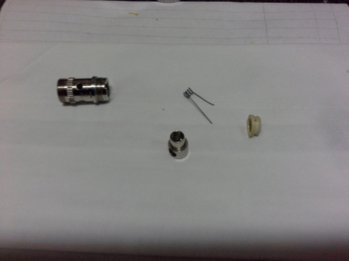
Please note that I left legs on that. Then the coil goes back in with the legs pointing down (direction the rubber and metal bit came out of). I kept it in the right position by putting the 2.4mm screwdriver through again. Leave it there for the moment.
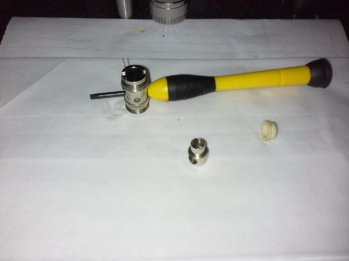
Next grab the pliers and bend the one leg over the side of the casing and snip it off with your precision snipper jobby. Then we insert the rubber bit (@free3dom assures me it's called a grommit ) back in, making sure the remaining leg goes through the middle of it.
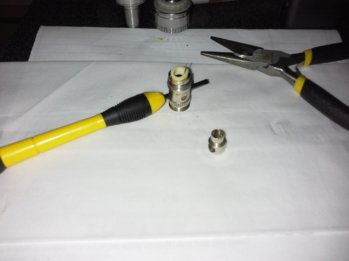
Insert the metal bit in, ignoring any protests from the wire . Once in place, bend the leg away and snip it off.
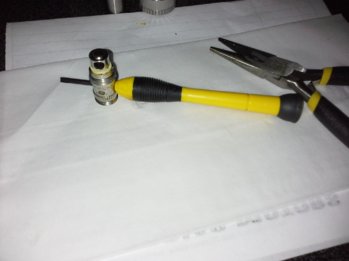
Now we can swing the coil around so we look down the open end. I used another screwdriver to make sure the coil was centered. The we can remove the 2.4mm screwdriver from the coil and prepare the wick.
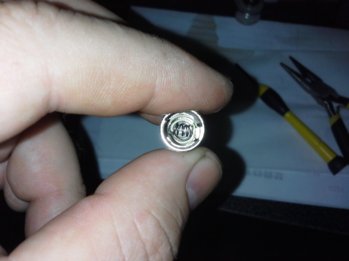
I used a normal piece of organic cotton. Roll it tight enough to go through the holes and the coil. Then snip it off. In this pick there are still some sticking out the sides but after juicing it up, I snipped it as close to the holes as I could.
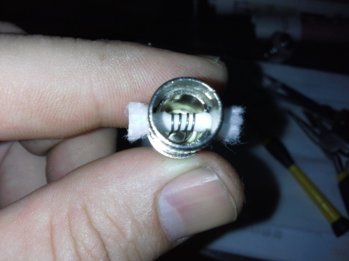
Next, juice her up and you're ready to go!
As for performance, she vapes as least as good as my new coil. Flavour is great and cloud is better. Been vaping at around 27w, which is my happy place with the Atlantis and 2 tanks in, still no dry hits. That said, it did take around 10 good puffs to run her in.
I might also mention, that I've had no spitting! And - liking the really open draw of the Atlantis - I think this is more open (open'er?).
I have one concern and that is about the longevity of the rubber bit. Will keep an eye on that because I'm not sure it was designed for the direct heat.
But a fun project
PS: IMPORTANT: Don't put the little round sieve bit back. There is a very good chance that could short out your build!
PPS: I noticed that when the juice levels gets down to the top of the little cutouts at the bottom of the coil housing as you look at the tank, it doesn't feed the juice so well anymore. I might need some pressure to give a good continuous feed? Just be aware. I did however notice a similar trend with the stock coil.
Start by disassembling the coil. Don't have pics for this but basically, you pull out the metal bit, the rubber bit, the little round sieve and the old coil and wicking. Be careful not to remove the lining on the side (for the moment).
Now about that lining. This might be the only tricky bit. Remove it carefully so as not to tear it. I used a small precision screwdriver and just teased it out. Now, cut two smaller pieces from it. There are two open holes and two covered by a metal bit. Insert the smaller pieces back behind these metal bits. I cut them to be the same width as the metal bits. After teasing them back in, you will see it from the outside. The open holes must remain open.
Now we build the coil. I did 4 wraps of 26g around a 2.4 screwdriver to give me something just north of 0.5ohms. This is not a tight coil. Tried that and got dry hits. Looks like this:

Please note that I left legs on that. Then the coil goes back in with the legs pointing down (direction the rubber and metal bit came out of). I kept it in the right position by putting the 2.4mm screwdriver through again. Leave it there for the moment.

Next grab the pliers and bend the one leg over the side of the casing and snip it off with your precision snipper jobby. Then we insert the rubber bit (@free3dom assures me it's called a grommit

Insert the metal bit in, ignoring any protests from the wire

Now we can swing the coil around so we look down the open end. I used another screwdriver to make sure the coil was centered. The we can remove the 2.4mm screwdriver from the coil and prepare the wick.

I used a normal piece of organic cotton. Roll it tight enough to go through the holes and the coil. Then snip it off. In this pick there are still some sticking out the sides but after juicing it up, I snipped it as close to the holes as I could.

Next, juice her up and you're ready to go!
As for performance, she vapes as least as good as my new coil. Flavour is great and cloud is better. Been vaping at around 27w, which is my happy place with the Atlantis and 2 tanks in, still no dry hits. That said, it did take around 10 good puffs to run her in.
I might also mention, that I've had no spitting! And - liking the really open draw of the Atlantis - I think this is more open (open'er?).
I have one concern and that is about the longevity of the rubber bit. Will keep an eye on that because I'm not sure it was designed for the direct heat.
But a fun project
PS: IMPORTANT: Don't put the little round sieve bit back. There is a very good chance that could short out your build!
PPS: I noticed that when the juice levels gets down to the top of the little cutouts at the bottom of the coil housing as you look at the tank, it doesn't feed the juice so well anymore. I might need some pressure to give a good continuous feed? Just be aware. I did however notice a similar trend with the stock coil.
Last edited:


