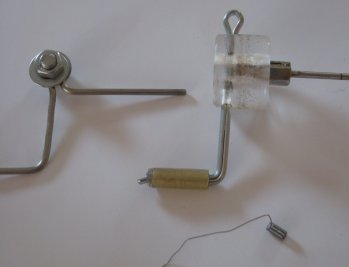
Here she is, the Deluxe Coiler, consisting of a coiler and tension tool. The tension tool is the heart of the device as it is responsible for the consistent and even tension.
NO heat or tweezers needed for compression, either on the coiler or afterward in the atty, to create a neat coil.
The consistent tension allegedly ensures the coil oxidizes and heats up evenly creating a better flavour profile.
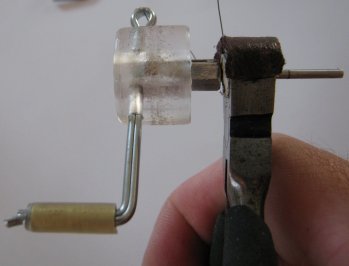
Wandering the interwebs early morning led me to super_X_drifter and his Reo reviews, in the background I noticed a nice coiler which he then discussed near the end of his vid. It was made for him by a user named turbocad6.
The turbocad6 coiler build video where he uses a paperclip and some pratley putty to create the coiler.
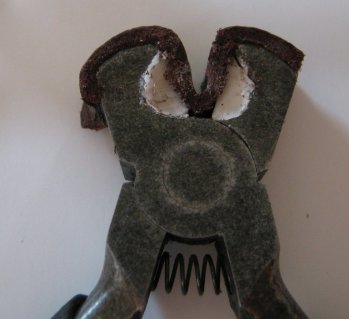
Tension tool part, was a cheap worn nipper cutter.
Jaws were lined with leather and padded with a small piece of eraser.
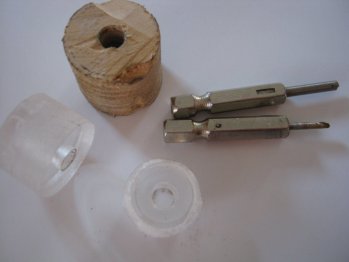
Made from scrap perspex and broken screwdriver drill bits, this is the last coiler I'll ever need.
Who'd believe there's a deluxe coiler in that scrap, all you need to add is a cotter/ split pin and a bit of brass tubing.
Let me tell you that once you get into the groove, everything looks like a coiler.
Tadaa!
I heated up the hex bit and forced into the perspex using a vise, in the process the 2mm bit came out, weak Chinese glue. So I just turned it around and forced it in and dripped some CA glue to keep it in place. The hex part was chopped short to leave room for a 3mm dia cotter pin handle. The brass tubing is a delux touch and not necessary for basic functioning.
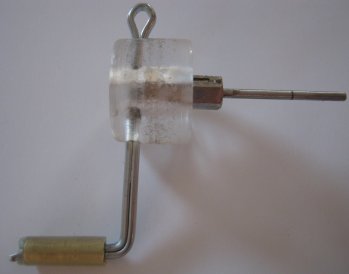
Version 1, a bit of a fiddle with hooking the kanthal under the washers and tightening up the screw.
Version 2 with a new test coil that’s just been slid off the mandrel.
NO heat needed to keep the coils in place, no heat needed to compress the coils either.
A closer look at virgin unheated kanthal wire, the first 2 winds were me with the hand to start it and after that it was the tension tool all the way.
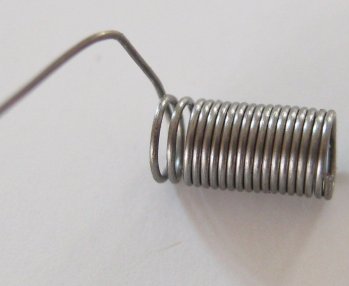
Another view of the tidied and trimmed coil.
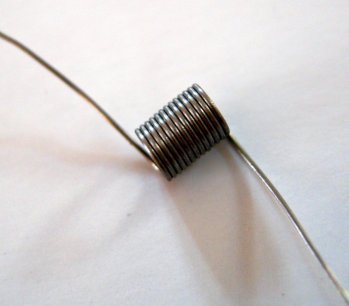
and another view of the coiler.
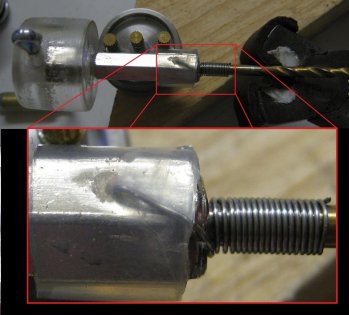
Here you can see the hacksawed slot that feeds the wire,
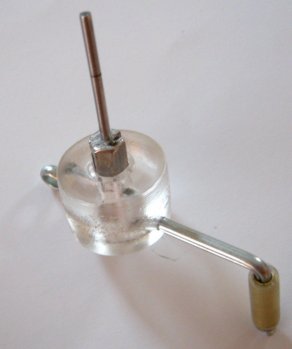
EDIT:06.11.2015
My final version uses standard driver drill bits with a small 1.5mm hole drilled in the base, I stuffed it with wood to make a tighter fit to stop the kanthal from pulling out, but a hard plastic, brass or copper tube would work far better than my temp silicon tube shown.
I think Ive stopped modding this now.
Dont need no Kuro Koiler or Coilmaster, save your money.
NO heat or tweezers needed for compression, either on the coiler or afterward in the atty, to create a neat coil.
The consistent tension allegedly ensures the coil oxidizes and heats up evenly creating a better flavour profile.

Wandering the interwebs early morning led me to super_X_drifter and his Reo reviews, in the background I noticed a nice coiler which he then discussed near the end of his vid. It was made for him by a user named turbocad6.
The turbocad6 coiler build video where he uses a paperclip and some pratley putty to create the coiler.
Tension tool part, was a cheap worn nipper cutter.
Jaws were lined with leather and padded with a small piece of eraser.

Made from scrap perspex and broken screwdriver drill bits, this is the last coiler I'll ever need.
Who'd believe there's a deluxe coiler in that scrap, all you need to add is a cotter/ split pin and a bit of brass tubing.
Let me tell you that once you get into the groove, everything looks like a coiler.

Tadaa!
I heated up the hex bit and forced into the perspex using a vise, in the process the 2mm bit came out, weak Chinese glue. So I just turned it around and forced it in and dripped some CA glue to keep it in place. The hex part was chopped short to leave room for a 3mm dia cotter pin handle. The brass tubing is a delux touch and not necessary for basic functioning.

Version 1, a bit of a fiddle with hooking the kanthal under the washers and tightening up the screw.
Version 2 with a new test coil that’s just been slid off the mandrel.
NO heat needed to keep the coils in place, no heat needed to compress the coils either.

A closer look at virgin unheated kanthal wire, the first 2 winds were me with the hand to start it and after that it was the tension tool all the way.

Another view of the tidied and trimmed coil.

and another view of the coiler.
Here you can see the hacksawed slot that feeds the wire,

EDIT:06.11.2015
My final version uses standard driver drill bits with a small 1.5mm hole drilled in the base, I stuffed it with wood to make a tighter fit to stop the kanthal from pulling out, but a hard plastic, brass or copper tube would work far better than my temp silicon tube shown.
I think Ive stopped modding this now.

Dont need no Kuro Koiler or Coilmaster, save your money.
Last edited:


