Following the conversation about the pain of RTAs when they either leak, or dry hit, I said I would share the wicking method that worked best for me. I have had no issues after using this method multiple times. It's made me enjoy the tank more, and I'm no longer daunted by "quickly" rewicking before I always go out, because I trust it to always wick really well.
Pictures are not the greatest, but hopefully it helps anyone who is about to throw the Zeus Dual against the wall. Also, this method may exist somewhere, I don't know. I thought I'd share nonetheless.
Basically this method makes use of only one side of each coils wick. The unused side of each coil just "leeches / bridges" off the main wick. There is less wick to cause a dry hit, and you can be more generous with the wick on each coil as it's only one tail that sits in the juice well:
Queue image heavy post. Now:
1. Cotten em' up. Get a good amount of wick through the coils. These are 3mm for reference. They're tight enough to need a pull, but not enough to warp the coil or it's legs.
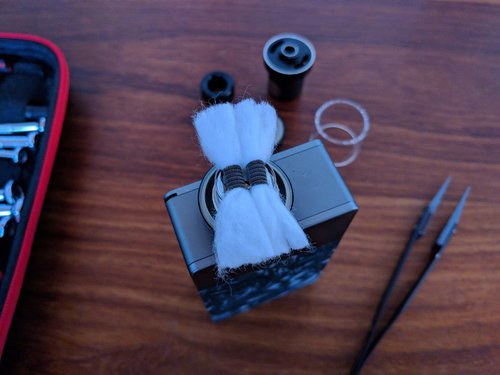
2. Haircut pt1. Get rid of that excess fluff. I just run my ceramic tweezers through the cotton, outward until it runs through without picking up excess cotton.
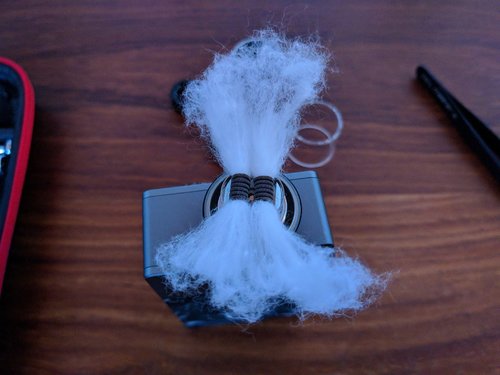
3. Haircut pt2. Cut the wicks. Just long enough so when they fold down, they sit just barely inside the juice well. Step 5 shows how there is just enough cotton to keep it there. Barely.
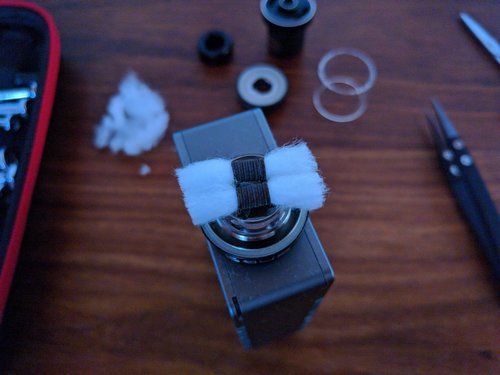
4. If you can't play nice. Separate both wicks completely. We're going to be working with them independently.
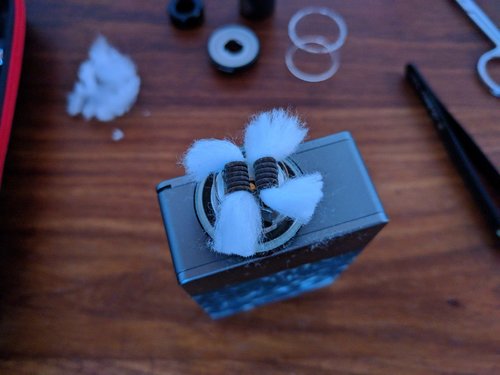
5. Keep arms and legs in the vehicle. Tuck in one wick on one coil (coil A). Then, tuck in one wick on the opposite coil (coil B). Leave the remaining tails untucked.
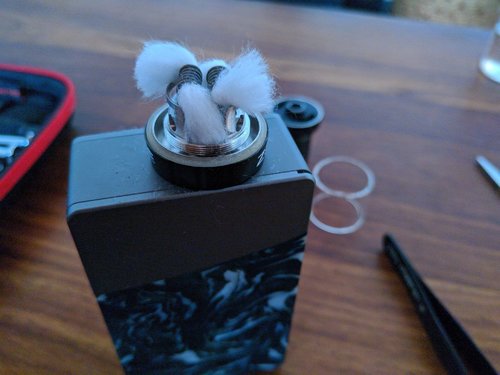
6. Admire how cool it looks. (Better reference image, really)
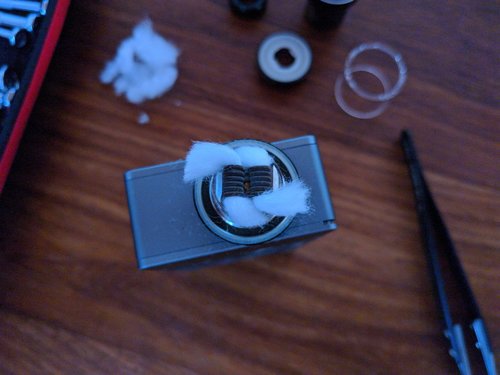
7. Haircut pt3. Trim the remaining expose wicks short. I trim them so that they are just able to touch the top section of the tucked wicks (ie. a little below where the top wicks exit the coils)
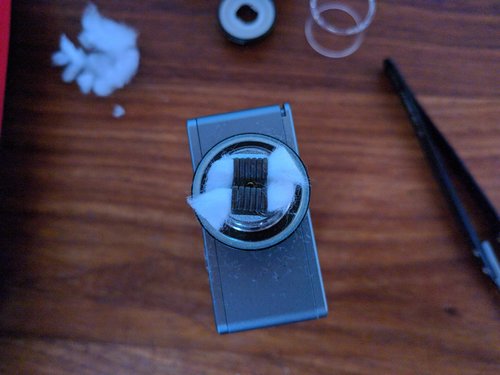
8. Cold feet. Wet the long wick tails, but don't over-saturate. Just enough to make them stay put.
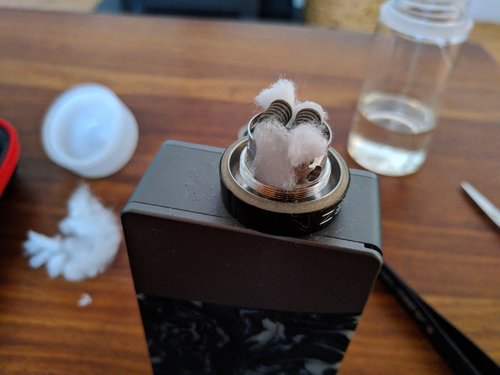
9. Friends! Press the short wick tails against the upper portion of the long wick tails with juice (and the bottle). Don't cram any excess cotton from the short tail against the long tail, just gently paint them together.
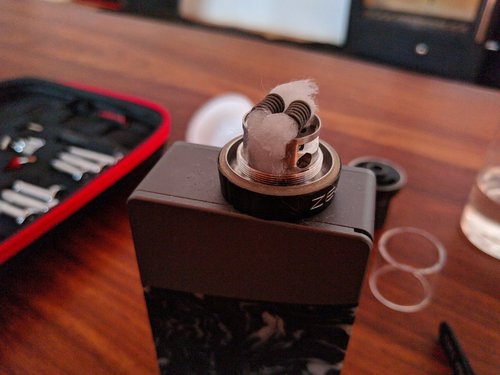
10. Haircut pt4! Remove the excess cotton seen above. (This looks odd, so close to the coil, but there is enough cotton in the coil itself anyway. Leaving this piece might burn against the coil)
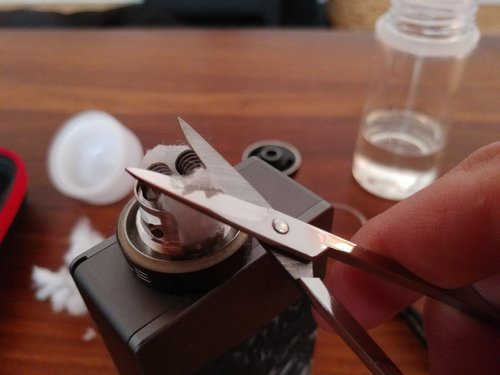
11. Saturate and vape away! (NB: the chamber section needs to slide over carefully. It will take care of the bulging cotton. This way, you make sure that the cotton is filling the voids, so there is no flooding when refilling):
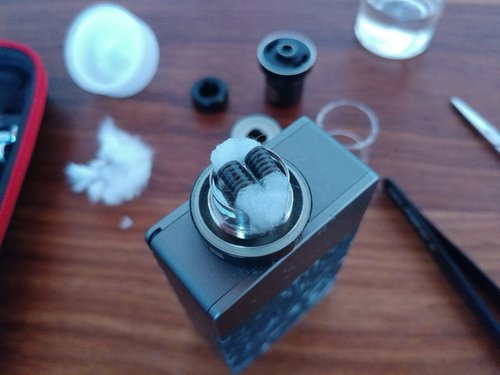
Pictures are not the greatest, but hopefully it helps anyone who is about to throw the Zeus Dual against the wall. Also, this method may exist somewhere, I don't know. I thought I'd share nonetheless.
Basically this method makes use of only one side of each coils wick. The unused side of each coil just "leeches / bridges" off the main wick. There is less wick to cause a dry hit, and you can be more generous with the wick on each coil as it's only one tail that sits in the juice well:
Queue image heavy post. Now:
1. Cotten em' up. Get a good amount of wick through the coils. These are 3mm for reference. They're tight enough to need a pull, but not enough to warp the coil or it's legs.

2. Haircut pt1. Get rid of that excess fluff. I just run my ceramic tweezers through the cotton, outward until it runs through without picking up excess cotton.

3. Haircut pt2. Cut the wicks. Just long enough so when they fold down, they sit just barely inside the juice well. Step 5 shows how there is just enough cotton to keep it there. Barely.

4. If you can't play nice. Separate both wicks completely. We're going to be working with them independently.

5. Keep arms and legs in the vehicle. Tuck in one wick on one coil (coil A). Then, tuck in one wick on the opposite coil (coil B). Leave the remaining tails untucked.

6. Admire how cool it looks. (Better reference image, really)

7. Haircut pt3. Trim the remaining expose wicks short. I trim them so that they are just able to touch the top section of the tucked wicks (ie. a little below where the top wicks exit the coils)

8. Cold feet. Wet the long wick tails, but don't over-saturate. Just enough to make them stay put.

9. Friends! Press the short wick tails against the upper portion of the long wick tails with juice (and the bottle). Don't cram any excess cotton from the short tail against the long tail, just gently paint them together.

10. Haircut pt4! Remove the excess cotton seen above. (This looks odd, so close to the coil, but there is enough cotton in the coil itself anyway. Leaving this piece might burn against the coil)

11. Saturate and vape away! (NB: the chamber section needs to slide over carefully. It will take care of the bulging cotton. This way, you make sure that the cotton is filling the voids, so there is no flooding when refilling):

Last edited:


 ok, well at least it's been documented I guess!

