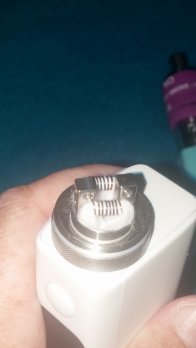
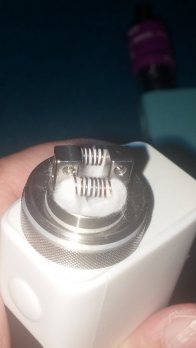
Aromamizer RDTA by Steam Crave

Since I noticed the lining up of the air flow holes I've also loosened the tank abit to get the coils to line up.
Can you please provide the link to the thread where they mention about sanding down the base/top.
Thanks.


Sent from my iPhone using Tapatalk

https://www.e-cigarette-forum.com/forum/threads/aromamizer-rdta-by-steam-crave.687100/page-67


3rd post on the page. Couldn't find the original. Hope it helps. Just need some smooth water paper and sand it 2 strokes and check it. Rinse and repeat.
 
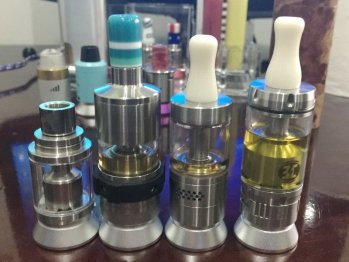
Here is a pic of the tanks next to each other!
Goblin Mini, Aromamizer, Bellus and Billow 2.
Tanks 002.JPG
 
And this is the size comparison to the 3ml version.
53208431c587e19992636ebd56598a40.jpg


Sent from my iPhone using Tapatalk
 
And this is the size comparison to the 3ml version.
53208431c587e19992636ebd56598a40.jpg


Sent from my iPhone using Tapatalk
those three tanks are my exact setup right now as well. im yet to hit the sweet spot on the aromamizer. but the bellus and gob mini are amazing.
 
Have the Bellus, Aromamizer (6ml) and Goblin mini also on rotation and comming from subtanks (which i still use for mindless vaping), all I can say is " Goodness, Gratious, Great Plumes of Flavour! :OMGWOW:
 
Getting mine this morning, sitting by the window waiting for the courier...lol
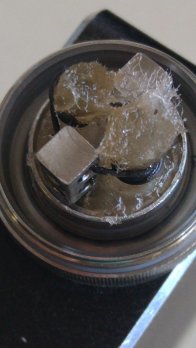
Anyways the trick to this is to much cotton = dry hits to little cotton = dry hits (it must be just right).When wicking make sure the the ends of your cotton just about touch the bottom deck.DO NOT STUFF IT DOWN.


you can skip to about 16:20 and he takes a pic of what the wicking should be towards the end

I hope this helps @Rob Fisher
 
Just re wicked. Loaded band camp. Wound up to 60w. This thing is magic the flavours are way different
 
Mine has arrived a few hours ago thanks @KieranD :rock:

Built a dual vertical Clapton coil @0.40ohms. The trick with vertical coils is after you built and got those coils glowing from the inside out ,is to remove them from the deck (after its cooled down) then feed your cotton through your coils ,cut it to size and assemble back again.

NO DRY HITS and she vapes like a champ.
 
Hi guys, so I got this tank today, did a standard build 24g kanthal 7 wraps, and I think my wicking is completely off because I can't stop getting dry hits. Can anyone please post a picture of how I should wick it. Thanks it will be much appreciated.
 
Hi guys, so I got this tank today, did a standard build 24g kanthal 7 wraps, and I think my wicking is completely off because I can't stop getting dry hits. Can anyone please post a picture of how I should wick it. Thanks it will be much appreciated.
The tails of the wicks should just be touching the area where the holes are.. No folding of the wick or stuffing..
Wicking is quite forgiving on this tank.


Sent from my iPhone using Tapatalk
 
Thanks a lot bud!! Much appreciated.. Will read through it before I give it a shot.


Sent from my iPhone using Tapatalk
@skola did you manage to get your coils to line up with the airholes bud? only seen now that mine do not line up. tried multiple builds, all with a very very muted, tame vape. really not enjoying this atty yet, tried 3 x vertical builds, 3 x horizontal.
 
@skola did you manage to get your coils to line up with the airholes bud? only seen now that mine do not line up. tried multiple builds, all with a very very muted, tame vape. really not enjoying this atty yet, tried 3 x vertical builds, 3 x horizontal.
Yip, found a great tip on reddit. No need to sand down any parts. Works great.
Unscrew the deck from the bottom section. Place the deck section in the tank and line up the coils with the air holes. You can then screw the bottom piece back on. It wont turn the deck in the tank so your coils will remain in line with the airflow.
Even when you remove the bottom section to refill, the deck will remain in the tank.

I still get muted flavour after countless builds.. Selling my tank in the Classifieds.
cool. ive tried the builds that i know really well. as well as new ones. its just not happening. this was too expensive for me to just give up on it just yet haha. will give it a little while longer. ive also tried jap cotton, rayon, regular wicking, scottish roll. range of id's from 1.5 to 3mm. guages from 24 - 30. lets see how it pans out thanks man
 
cool. ive tried the builds that i know really well. as well as new ones. its just not happening. this was too expensive for me to just give up on it just yet haha. will give it a little while longer. ive also tried jap cotton, rayon, regular wicking, scottish roll. range of id's from 1.5 to 3mm. guages from 24 - 30. lets see how it pans out thanks man
Good Luck.. Maybe you'll find a solid build and a solution to this lack of flavour before i sell the tank.. lol. I've given up building anything else in this this tank.
 
tried that method, is it right that the bottom cap will now not screw down completely
 
When wicking make sure the the ends of your cotton just about touch the bottom deck.DO NOT STUFF IT DOWN.
I have a dual vertical and my wick is well onto the deck. I pull the cotton through from the top to the bottom and then fluff it out. I would say at least 2/3 mm onto the deck. Never had a dry hit. I only used my own intuition from past experience and never watched any video or saw any pictures.

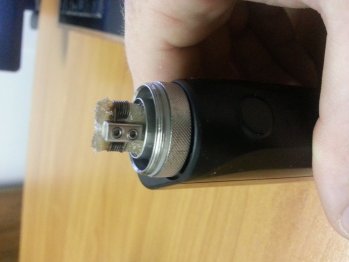
See pic.

2015-11-03 10.45.20.jpg
 
Mine screws down tight like normal.. Well the bottom cap feels tight.
Ok so got it to line up and the vape is alot warmer and has loads more flavour than earlier. Only problem is that it was tasting like ass, now its tasting like warm full bodied ass.
 
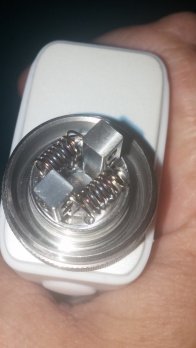
Just some pics of how we did my coils and the wicking - not one dry hit in the house. Absolutely love the taste and flavour and everything about this little tank.
Plus it is totaly noob friendly!

This is a SS build that got us to 0.24 and its perfect.20151210_214141.jpg 20151210_215140.jpg 20151210_215150.jpg
 
Just some pics of how we did my coils and the wicking - not one dry hit in the house. Absolutely love the taste and flavour and everything about this little tank.
Plus it is totaly noob friendly!

This is a SS build that got us to 0.24 and its perfect.View attachment 41049 View attachment 41050 View attachment 41051
I am so impressed at your level of expertise after just 2 months of vaping:clap::clap::clap:. The Aromamizer is on my list for as soon as they have a proper air flow control mechanism on there.
 
I am so impressed at your level of expertise after just 2 months of vaping:clap::clap::clap:. The Aromamizer is on my list for as soon as they have a proper air flow control mechanism on there.
Heheh thanks @Andre - its because the people here are very helpful and friendly and they teach Nimatek everything which he then teaches me. I have to say tho I am totally in love with this tank and would easily get 2 more for rotation.
 
I am so impressed at your level of expertise after just 2 months of vaping:clap::clap::clap:. The Aromamizer is on my list for as soon as they have a proper air flow control mechanism on there.
I resolved mine and removed the rubber ;) Looks great now. Airflow for me is perfect.
 
Back
Top