Hello! So here's my utterly disorganized tutorial, so please read till the end first before you summarize the info and use it to build your coil haha. @paulph201 @Yiannaki @Alex 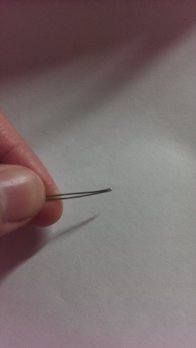 first, get a strand of 24 g wire double of your choice of length (if you need 10 cm pull out 20 cm), then fold it in half, use a pair of pliers to crimp it slowly until it's as close together as possible (like the pic above).
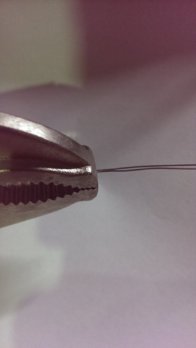
next, if you can't get hold of a drill, clamp the wire at the crimp between "this pliers thing that has a locking mechanism" in the pic above, alternatively you could thread the wire through a key's hole or something you could hold on to.
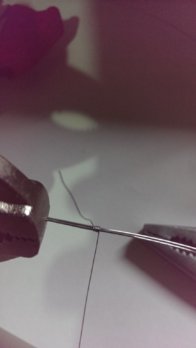
next, while keeping the 32 g wire on the spool, wrap like how you would for a normal coil over the 24 g wires as tightly as possible, a few wraps is enough, then push it tightly against the pliers/key.
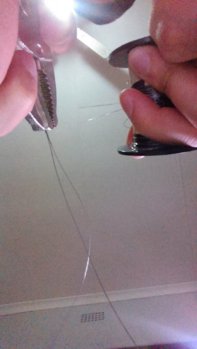
next, hold the spool close to the pliers with one hand and hold the pliers with the other (see pic above, sorry I couldn't find the rotated pic after I rotated it), now slowly rotate the pliers so the 32 g wraps around the 24 g wires. (don't really need to straighten the wires in advance, just don't let it whack your face when you rotate it)
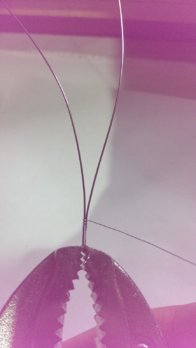
now if the wires don't wrap tightly enough, just push the wires closer together, if that's still not close enough, then unwrap and rewrap.
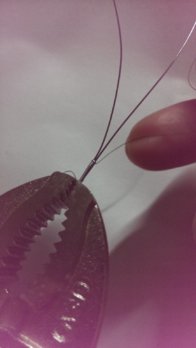
same goes with overlapping, just unwrap and rewrap.
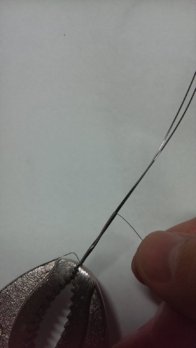
here's a pic of 20 min worth of wrapping haha
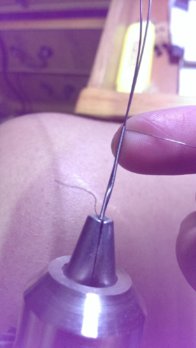
now if you can get hold of a drill, that's another story things will be much faster. Just clamp the wires as shown above, make sure the drill spins in the right direction, go slow and steady.
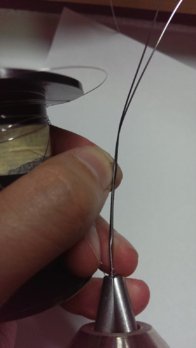
I tried the above method, holding the spool in my hand while I use my thumb nail to keep the 32 g on track, but it did not work as well as I'd like.
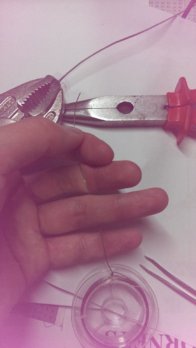
What then worked for me, was to wrap cellotape around my first finger (so when the wire rotates on it it does not feel like it is burning your skin off). Then I'd let the spool roll on the ground and hold the wire like the pic above so I could control the tension in the wires while I fed it (used 24 g in the pic just so it could be seen more clearly than 32 g), use your thumb nail to keep the wire on track while the Clapton rotates on your cellotaped first finger. Rewrap where necessary. Once you get the hang of it, you can go slightly faster.
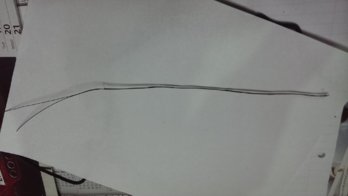
here's what I ended up with, ran outta 32 g haha. It ended up as a 20 cm Clapton wire (40 cm 24 g required).
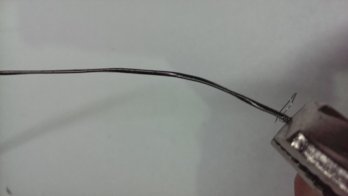
don't worry if it's all twisty, just clamp it down again, and use a pair of pliers to twist it straight, doesn't need to be super straight cuz when you wrap it it will tidy itself up.
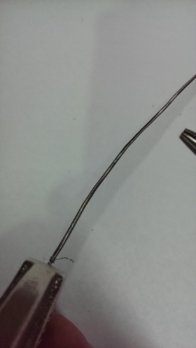
should end up something like this. Then all you do is push the wraps closer together one last time then wrap your coil with it 7 wraps on a 2.4 mm screwdriver gave like 0.34 ohms if I remember correctly, so around 0.04857 ohms per wrap, or something. Good luck! Hope this was helpful in some way
 first, get a strand of 24 g wire double of your choice of length (if you need 10 cm pull out 20 cm), then fold it in half, use a pair of pliers to crimp it slowly until it's as close together as possible (like the pic above).
next, if you can't get hold of a drill, clamp the wire at the crimp between "this pliers thing that has a locking mechanism" in the pic above, alternatively you could thread the wire through a key's hole or something you could hold on to.

next, while keeping the 32 g wire on the spool, wrap like how you would for a normal coil over the 24 g wires as tightly as possible, a few wraps is enough, then push it tightly against the pliers/key.

next, hold the spool close to the pliers with one hand and hold the pliers with the other (see pic above, sorry I couldn't find the rotated pic after I rotated it), now slowly rotate the pliers so the 32 g wraps around the 24 g wires. (don't really need to straighten the wires in advance, just don't let it whack your face when you rotate it)

now if the wires don't wrap tightly enough, just push the wires closer together, if that's still not close enough, then unwrap and rewrap.

same goes with overlapping, just unwrap and rewrap.

here's a pic of 20 min worth of wrapping haha

now if you can get hold of a drill, that's another story

I tried the above method, holding the spool in my hand while I use my thumb nail to keep the 32 g on track, but it did not work as well as I'd like.

What then worked for me, was to wrap cellotape around my first finger (so when the wire rotates on it it does not feel like it is burning your skin off). Then I'd let the spool roll on the ground and hold the wire like the pic above so I could control the tension in the wires while I fed it (used 24 g in the pic just so it could be seen more clearly than 32 g), use your thumb nail to keep the wire on track while the Clapton rotates on your cellotaped first finger. Rewrap where necessary. Once you get the hang of it, you can go slightly faster.

here's what I ended up with, ran outta 32 g haha. It ended up as a 20 cm Clapton wire (40 cm 24 g required).

don't worry if it's all twisty, just clamp it down again, and use a pair of pliers to twist it straight, doesn't need to be super straight cuz when you wrap it it will tidy itself up.

should end up something like this. Then all you do is push the wraps closer together one last time then wrap your coil with it


