Help, please....

Viper_SA

https://www.tiktok.com/@tinus_viper?lang=en
LV
47
 
Joined
19/2/15
Posts
5,083
Awards
41
Age
47
Location
Sasolburg
During the last few days I have been experimenting with different coil builds on my Kanger subtank mini. As the power increased, I noticed dry hits from time to time. Went back to my normal 0.7 ohm 2.5mm single coils. Tried wicking with Dischem cotton balls (as always) and KGD cotton. Still got dry hits when chain vaping, which was never an issue. running between 18-25W. Saw a thread where the guy used a Dremel to open up the juice slots a bit. Did that earlier today, rewicked, and still getting dry hits on 60/40 juice....

I'm at my wit's end here, lol. The mAN is working overtime to keep up with nicotine delivery :D
 
Three things i've done seemed to help....

1. Replaced the o-rings...
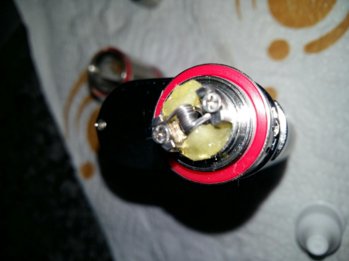
2. When wicking, divide the cotton tails into two on each side (so four in total)..then screw in the sleeve and then position the wick tails away from the tiny juice opening. Make sure they are far from the juice opening but touching the deck.
3. I unscrew the tank (glass piece) from the base about 3/4 turn.. seems to improve the flow.

I'm not sure which of the above makes the difference.. but i've not had issues since doing this...

Hope it helps..
 
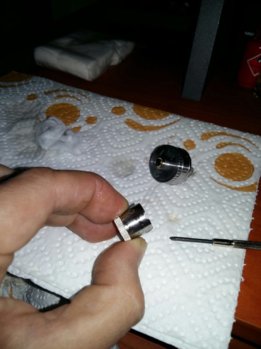
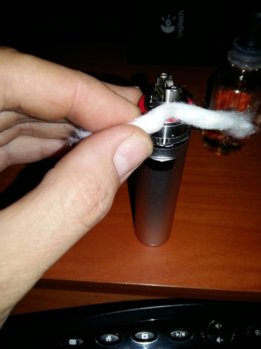
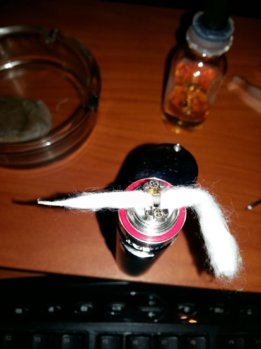
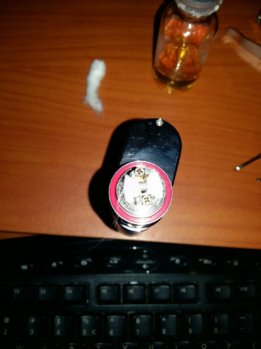
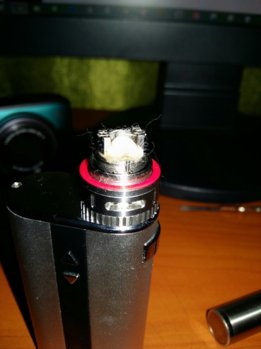
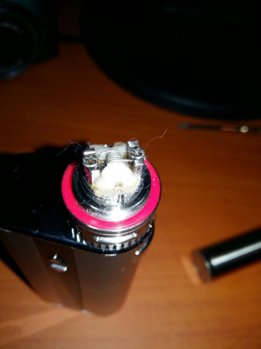
Tried doing that, unless I'm doing it wrong. Was working fine, until I started chasing power and clouds on it. Two weeks ago I couldn't do a lung hit above 11W, now 25W feel week and like there is no airflow :D I turned the power down to 20W from 25W, choked it to the two hole airflow, and it seem better. Can someone maybe post a pic of the perfect wicking for the subtank RBA deck please? I install the chimney after the wick, otherwise I seem to over-tighten the chimney and can't get it loose. So the top-cap and chimney go on as one. Don't seem to be catching any wick in the threads or anything.
 
Thanks for all the replies thus far, just glad it isn't just me, lol. I remember all too well the helpless feeling I had when I kept burning wicks on the mAN and had to chuck two boxes of coils in one weekend... This is much easier though, and cheaper.
 
Wondering what the average resistance and wattage is that are used on the subtank here. Maybe I'm trying to push it too far?
 
I have tried to thin it out a bit, and clipping it shorter, but then I ran out of wicking on the paracoil setup. Might need to look at less wicking material in the normal coil setup..
 
@Viper_SA , please take the wick away from the joose hole , you must be able to see the joose hole when the cap barrel is back on . no need to anything else ..
 
@Viper_SA , all the foto 's , remember wick does it's own thing when its in the dark , it will move , have parties , throw tantrums , stop talking , the whole bang shoot .
joose that wick and make sure no part comes close to the joose holes . i have posted a pic of this , will look for it ..
 
@Viper_SA

My 2c would be to try less wick and move it away from the juice hole. There was a comprehensive post some weeks back in this setup.

Also maybe flip the coil so that there is more space between the airhole and the coil for airflow.

Hope it helps

I know these tanks can be difficult when it come to wicking. Just keep at it

Sent from my Note 4 using Tapatalk
 
I agree that there is too much wick as well. Try 2/3 the thickness you have.

I usually fluff it out, hold it to the edge of the deck, then cut off the extra. Then start pushing it toward the center of the deck and trimming and shaping a little at a time until it sets against the center and just touches the base.

Don't stretch it to base though as I once did this and when it swelled up with liquid, it move up from the base amd juice and I got a dry hit and burnt the wick.

I also put the chimney on afterwards and put some juice on it, then align the ends away from the side wall and toward the channels with a toothpick or small screwdriver. Maybe it will work for you.
 
Okay I'm a bit late to this party but it seems you've still not got it working the way you want :(

As all the others have mentioned, use WAY LESS wick...in my experience with the ST Mini the less cotton I use the better it wicks. What I do is basically take the minimum amount of wick that sits snug inside the coil, then I make sure that the ends sticking out are rolled (lightly) so they are only slightly thicker the the ID of the coil. Finally I cut them so that they hang down and just make about 2mm worth of contact on the deck (when juiced up) - no "bunching up" of the cotton as it will expand and cover the juice channels :D

This works for my vaping style, which is arguably on the lower end of the spectrum when it comes to power. Unfortunately, KangerTech have not really provided enough juice flow with the RBA for really intense clouds and super high power. But that said, with the enlarged holes you've made, you should be fine if you use the method above - I say "should" because I haven't actually tried it, but at 20-30W I've never had a dry hit with 60VG and below - higher than that I do run into dry hits :(

My RBA is still the previous iteration and the juice channel openings are tiny. They have improved them with your version (the holes go right down through the bottom) so YMMV :)

I do know that you can drill the juice channels bigger - not open the holes, but actually enlarge the channels. This should be a long term fix, but I'm waiting for local vendors to have stock on the RBA only before I will even attemt that ;)

In the end (sorry for the long story), the SubTank Mini really wasn't designed for very high VG (with the RBA) and/or very high power (with either the RBA/coils). This is quite sad as I think the tank has great potential in that area. Hopefully KangerTech will address this issue with the next iteration (or perhaps a new tank) - but that does not help those of us who already have the current one o_O

TL;DR - use much less cotton (almost to the point where you are certain it will just flood right away) and see if that helps ;)
 
Also forgot. Please fluff the wick once you thread it through the coil and keep fluffing it as you cut and shape if you don't already. You can use you fingers first and then a toothpick. This will allow the coil to saturate more easily.

Another mistake I made and burnt my coil on its first run was putting a few drops of liquid on the coil. I usually put about 10 drops to kick start it and that seems to work fine.
 
So today I decided to drop the 0.5 subtank coil in the "wash", and give the RBA head a try.

Holy hell, this is not nice!
Those wick channels are way too small! I have to continuously primerpuff the thing (every 2-3 draws) just to not get horribly dry hits. This on homemade 50/50 juice...

Not having a dremel, nor access to any - this is probably not going to be an awesome time in my vapelife.
Might just put the stock coil through it's paces until it's buggered and then rebuild that instead.

TLDR - Subtank Mini RBA head is garbage imo.
 
I do a 6 wrap 26g 2.4mm ID 'ugly' coil. Wick normally with Japanese cotton & never had a dry hit. Flavour much better than standard coils. I keep cotton well away from juice channels. Been epic for 3 weeks now.

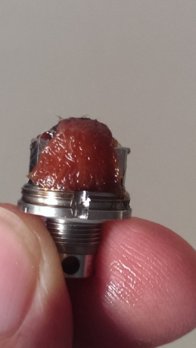
Here's a side on view with wick covering the whole deck
 

Attachments

  • 2015-03-31 15.56.16.jpg
    2015-03-31 15.56.16.jpg
    92.8 KB · Views: 23
Last edited:
Back
Top