I designed some basic Pulse V2 panels.

blujeenz

Loafing since 2013
LV
42
 
Joined
18/10/15
Posts
2,682
Awards
33
Age
62
Location
Cape Town, South Africa
By basic I mean a plain 3mm thick door, no radius-ed or chamfered edges.
No magnet holes in the back either, but it should be easy enough to edit in Tinkercad.
I made mine in ABS 0.4mm layer height and 100% infill so I could sand and slice the plastic.
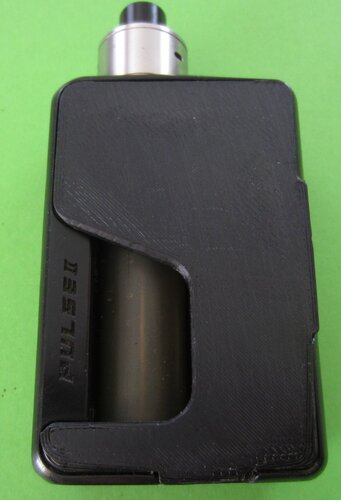
pulse v2 front door.JPG

The door varies in thickness from 2.25mm on the edges to 3mm in the center.
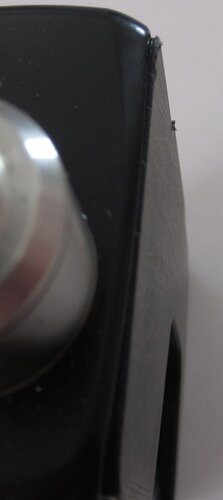
pulse top.JPG

The chamfer on the bottom is a variable width due to the curved doors, beyond my CAD abilities at the mo.
The one on the side is trickier because it starts from the door bottom surface, whereas cad programs will assume its an equal chamfer with a 45 degree angle, again beyond my skills at the mo.
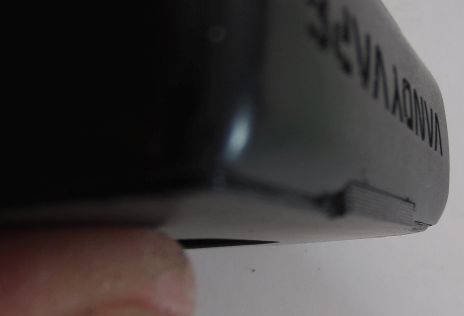
pulse chamfer.JPG

So I just took a blade and sliced the plastic in line with the body. Sanded with 320 grit wet&dry and it looks fine to me.

tagging @YzeOne cos you were looking for V2 stls which Ive zipped and attached.
 

Attachments

  • pulse v2 panels.zip
    64.3 KB · Views: 4
By basic I mean a plain 3mm thick door, no radius-ed or chamfered edges.
No magnet holes in the back either, but it should be easy enough to edit in Tinkercad.
I made mine in ABS 0.4mm layer height and 100% infill so I could sand and slice the plastic.
View attachment 249913

The door varies in thickness from 2.25mm on the edges to 3mm in the center.
View attachment 249914

The chamfer on the bottom is a variable width due to the curved doors, beyond my CAD abilities at the mo.
The one on the side is trickier because it starts from the door bottom surface, whereas cad programs will assume its an equal chamfer with a 45 degree angle, again beyond my skills at the mo.
View attachment 249915

So I just took a blade and sliced the plastic in line with the body. Sanded with 320 grit wet&dry and it looks fine to me.

tagging @YzeOne cos you were looking for V2 stls which Ive zipped and attached.

Thanks a million @blujeenz - really appreciate it.
Sending it now to our CAD guys
 
Well done @blujeenz. You could take a look at these panels on Thingiverse. Maybe try give these a print.
I must admit, i wont be able to print it in ABS (Yet) PLA is my go to.
https://www.thingiverse.com/thing:5164492
I've seen those, was already discussed on the pulse aio thread, they're 0.6mm thick fascia panels and as I mentioned there, I cant hollow out my grp panels to fit them.
 
Thanks a million @blujeenz - really appreciate it.
Sending it now to our CAD guys
most welcome, bear in mind that they are outer face down on the print bed, did it that way to get a smoother outer surface on my glass bed.
I spose "top layer ironing" in Cura would also work, but then magnet pockets on the bottom might create problems.
 
most welcome, bear in mind that they are outer face down on the print bed, did it that way to get a smoother outer surface on my glass bed.
I spose "top layer ironing" in Cura would also work, but then magnet pockets on the bottom might create problems.

I'm going to have our CAD touch up the files as per your initial detailing & give them my existing covers to compare.
Thereafter, i will send the .stl files to uglymonkey.co.za for a quote.
 
most welcome, bear in mind that they are outer face down on the print bed, did it that way to get a smoother outer surface on my glass bed.
I spose "top layer ironing" in Cura would also work, but then magnet pockets on the bottom might create problems.
I take it you mean the magnet pockets would require supports if printed backside down? I wouldn't even bother turning on supports for that. the gap covored is tiny so there shouldnt be any drooping.

And well done on the print. Looks awesome :headbang:
 
I'm going to have our CAD touch up the files as per your initial detailing & give them my existing covers to compare.
Thereafter, i will send the .stl files to uglymonkey.co.za for a quote.
Would love to know what they charge you. ;)
 
I take it you mean the magnet pockets would require supports if printed backside down? I wouldn't even bother turning on supports for that. the gap covored is tiny so there shouldnt be any drooping.

And well done on the print. Looks awesome :headbang:
Yip, my magnets are 2mm thick so it might cause hollows on the surface.
 
Yeah, didnt know about that one otherwise I wouldn't have made my own. :(
Anyhow learning curve benefited I guess.
All in the fun I guess. Amazing the tips and tricks you pick up but nothing is more satisfying than designing and printing something yourself and you get to say " I did that"

Sent from my vivo 2006 using Tapatalk
 
I used 49cc and it took 1hr 2min, so Im going to guess at R150 excl shipping.
I'm not sure on the size difference between the pulse v2 and the AIO but the ones I did (PLA not ABS) didn't cost more than R80. Magnets are cheap +- R2.50 each so a sub R100 for a set of hens teeth is worth it in my book.

Sent from my vivo 2006 using Tapatalk
 
I'm not sure on the size difference between the pulse v2 and the AIO but the ones I did (PLA not ABS) didn't cost more than R80. Magnets are cheap +- R2.50 each so a sub R100 for a set of hens teeth is worth it in my book.

Sent from my vivo 2006 using Tapatalk
I was going on "Uglys" website info, R1 per cc and R50 per hr.
I concur with sub R100 being worth it.
 
Back
Top