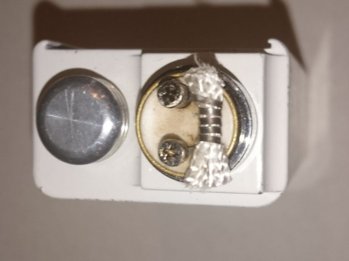
The Reomiser 2

i love the RM2 but hated the chrome finish. so i took a aluminum tube and made it fit over the RM2 to match the REO.
View attachment 23726
That looks great. If I am not mistaken, this is the first picture of your Reo in Reoville. And you have not yet received your official Reonaut badge. Here it is! How are you liking the Reo?

ZtRsnxF.jpg
 
That looks very innovative @hands Does having the tube not affect the airflow at all?
 
That looks great. If I am not mistaken, this is the first picture of your Reo in Reoville. And you have not yet received your official Reonaut badge. Here it is! How are you liking the Reo?
yea this is my first post in Reoville.
i had some dry hits while getting use to the REO coming from mindless tank vaping but i got use to it quickly. my other mods are useful for gathering dust now cause i have not touched them since i got a REO. i did not post because i did not fully own a REO but i do now. this is also my first box mod and i must say that i love the feel and size of the REO. so much so that its almost glued to my hand.
 
no i matched the air hole. its just not visible in the picture.

@hands, that aluminium cover is awesome

I wonder if you could make an aluminium cover that converts the RM2 to air flow controlled?
I.e. Make the RM2 airhole much bigger (like a slot) then another slot on the cover that overlaps. Then turn the cover to adjust the size available. Only thing is it would need to be quite airtight so air doesnt escape out the top or bottom.

That would be interesting...
 
One question about the RM2 if i may? How do you manage to vape an RM2 without the air intake hole ? I closed my Hole and tried to vape it. Didnt work
 
Drilled out the hole the morning to 1.5mm. What a pleasure to vape. And so much cloudness. Whats the origenal size of the air hole
 
So as HRH got ready to depart to JHB for a few days R&R, she wanted fresh coils. Here is a picture of her staple coil, 5 wraps Vaporwire ribbon around double 2mm Ekowool - around 0.85 ohms.

10462583_823412744343030_9138754950914406729_n.jpg
 
So as HRH got ready to depart to JHB for a few days R&R, she wanted fresh coils. Here is a picture of her staple coil, 5 wraps Vaporwire ribbon around double 2mm Ekowool - around 0.85 ohms.

View attachment 23783

Superb @vaalboy !
That should last a good while - Lol

What juices will HRH be vaping on that setup? Tobaccoes?
 
Wow I'm surprised... every time I have increased a hole in the RM2 or Cyclone there is a discernible flavour drop?

Had the same flav in bottel. Just unscrewed the cap drilled it out. Cleaned it and vaped along again. Dont seem to be any difference
 
Drilled out the hole the morning to 1.5mm. What a pleasure to vape. And so much cloudness. Whats the origenal size of the air hole

I think the original size of the RM2 airhole is 1.2mm @RoSsIkId
 
Superb @vaalboy !
That should last a good while - Lol

What juices will HRH be vaping on that setup? Tobaccoes?

She's a fruit bunny @Silver and to my absolute pleasure avoids my tobacco's like the plague :)

The beauty about that set up is it's super easy to build, lasts for ages and wicks really well.
 
She's a fruit bunny @Silver and to my absolute pleasure avoids my tobacco's like the plague :)

The beauty about that set up is it's super easy to build, lasts for ages and wicks really well.

I need to give the Ekowool another chance
Last time I just did one strand of 2mm Ekowool with the ribbon wire
I tried the tobaccoes -
Was nice but something was not right - couldn't put my finger on it - was some time back.

Need to give it another shot with two strands of Ekowool. Thanks for the post - I will try that soon...
 
I find that with just one strand, you end up having to sqonk too often especially if you take long draws like I do.

Just remember the key is to burn the Ekwool really well as it stops the fraying. I burn a piece of wick until white, then overlap so the two flattish sides meet. I wrap the ribbon starting from the looped side, wrapping towards the tag ends. Leaving the loop in place I trim the tag ends and then burn again until white and the coil red. I then fit, trim both the loop and tag ends to fit, dry burn a few times and bob's your uncle.

Many thanks !!
That helps
 
RM2 air hole size standard is indeed 1.2mm @Silver. My very first RM2 I drilled to a 1.5mm diameter and immediately tasted a flavor drop on mouth to lung hits. On direct lung hits I couldn't taste any difference in flavor, and assume @RoSsIkId is doing straight lung hits.

I do my Ekowool / Ribbon coil exactly as @vaalboy described, except I do a 4 wrap coil instead of 5.
 
Before i started reading all these comments there was no flavour drop. Now with everybody sayin it now my mind says wait a bit maybe there is. And my wallet already going ohhhhhhhhhh f@#k
 
Before i started reading all these comments there was no flavour drop. Now with everybody sayin it now my mind says wait a bit maybe there is. And my wallet already going ohhhhhhhhhh f@#k

I think VM stocks blank caps (without air hole) at a very reasonable price - get one and drill a standard 1.2mm. Somewhere under the Reoville thread @Alex shows a trick how to get the already bigger drilled hole back to standard size.
 
I think VM stocks blank caps (without air hole) at a very reasonable price - get one and drill a standard 1.2mm. Somewhere under the Reoville thread @Alex shows a trick how to get the already bigger drilled hole back to standard size.

Some lead free solder does the trick really well, but be VERY careful not to get any into the threads. (I found out the hard way just how tough that solder is to remove.) And then sand flush, and re-drill.
 
Back
Top